£2.50
T.Rex Cam
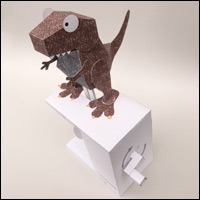
This project is a cam powered T.Rex automata. The head and lower jaw are driven by separate cams which can be interchanged to change the way the T.Rex moves and so tell a different mini-story.
The T.Rex is a fascinating project to make with students aged twelve and up. By building this model, students will be improve their skills in accurate cutting and scoring. Students will also learn how cam profiles can be used to create movement and how these movements can be used to act out a story.
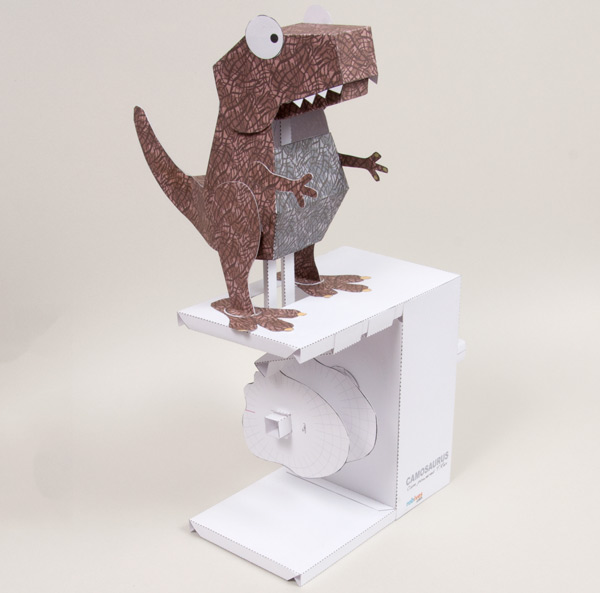

The project parts come as a downloadable file. Members of robives.com can download the file for free. Non-members can download the file for a payment of just £2.50.
Print out the parts onto thin card. (230 micron 67lb). Score along the dotted lines and cut out the holes before carefully cutting out the pieces.
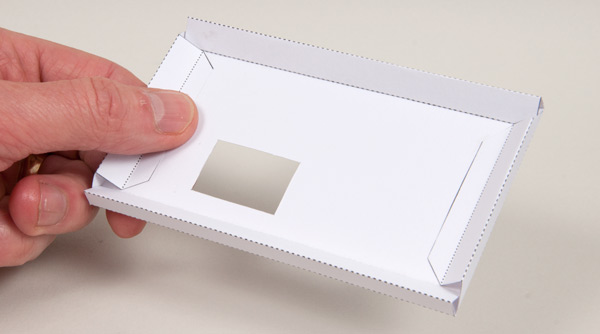
Make up the base and the top in the same way as shown in the picture above. Make sure that the edges are at right angles.
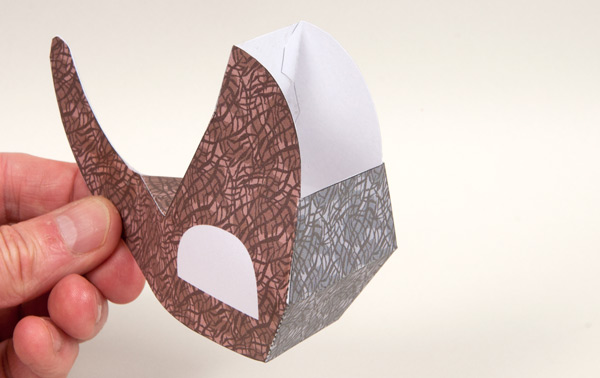
Glue together the four parts of the body.
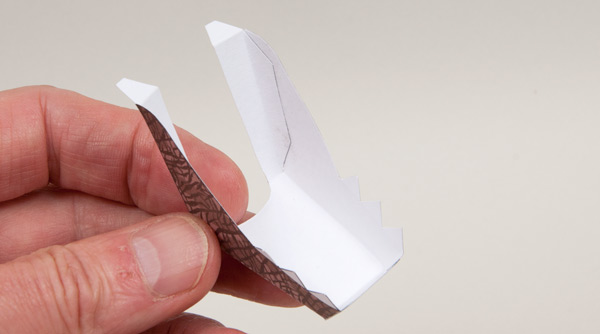
Assemble the lower jaw.
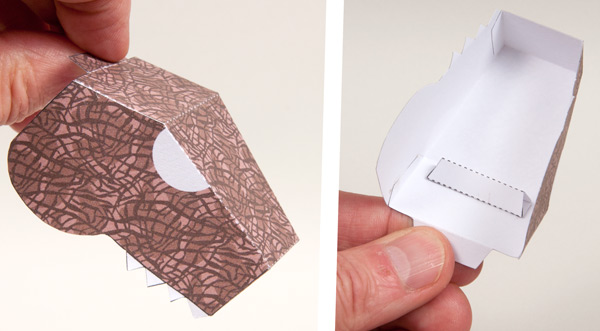
Glue together the head.
Fold round and glue together the head inner.
Glue the head inner into place so that it is lined up with the crease across the top of the head.
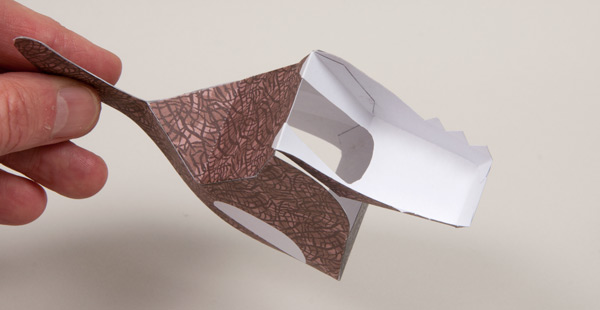
Glue the two tabs on the lower jaw to the top back of the body. Make sure that the lower jaw is free to move up and down.
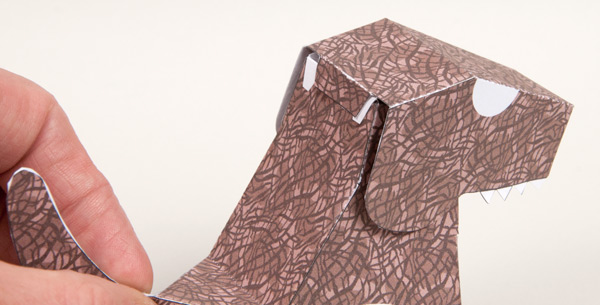
Glue the head tab into place on top of the lower jaw tabs.
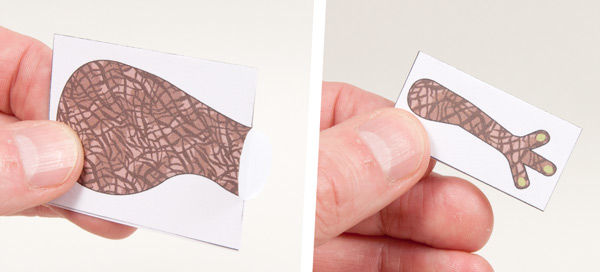
Fold the legs and arms into half and glue them together to make double thickness card. Once the glue is dry carefully cut out the pieces.
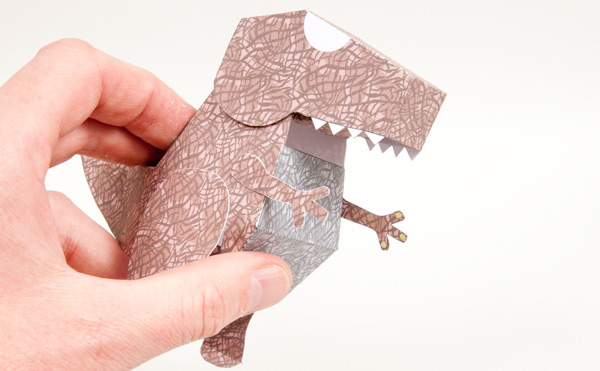
Glue the lower legs to the grey areas on the body. Note that the legs bend forwards at the joint, use this to get the right leg on the right side.
Glue the two arms into position as in the picture above.

Thread the jaw push rod up through the body and glue the tab to the grey area on the underside of the jaw.
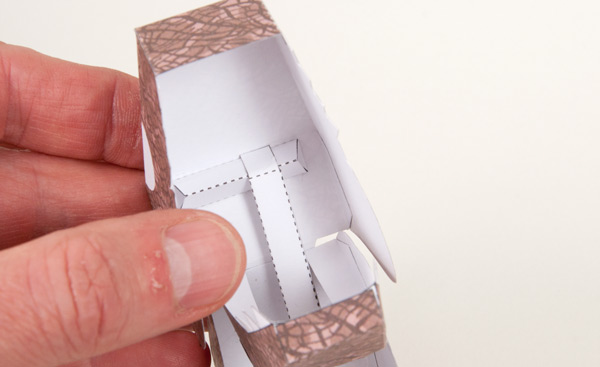
Thread the head push rod up through the body and glue it to the head support piece as shown.

Glue on the feet and glue the feet to the box top so that they are one on either side of the hole with the back of the foot just touching the back of the box top.
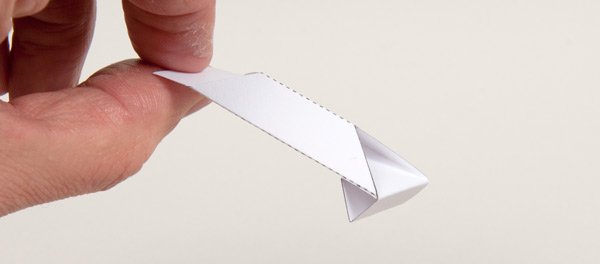
Fold up and glue together the two cam followers. Notice that the triangular section at the end of the cam follower use valley folds.
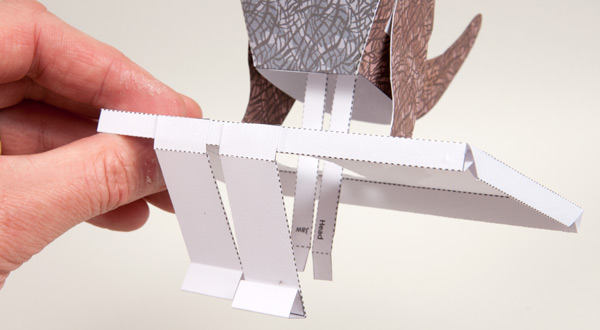
Glue the cam followers to the grey areas on the front of the box top.
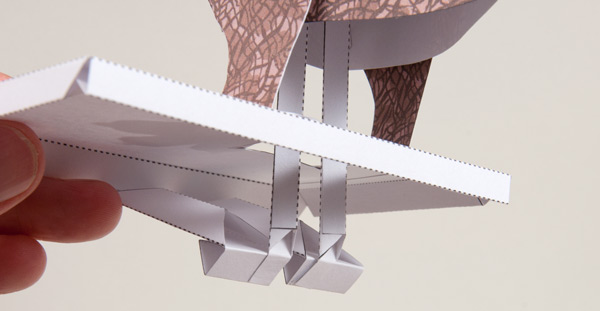
Glue the end of the push rods to the cam followers.
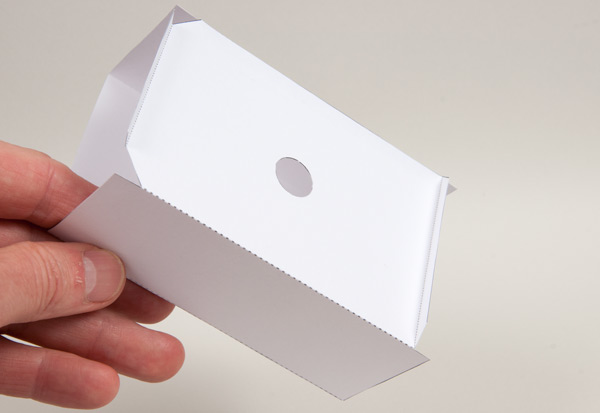
Assemble the two parts of the box.
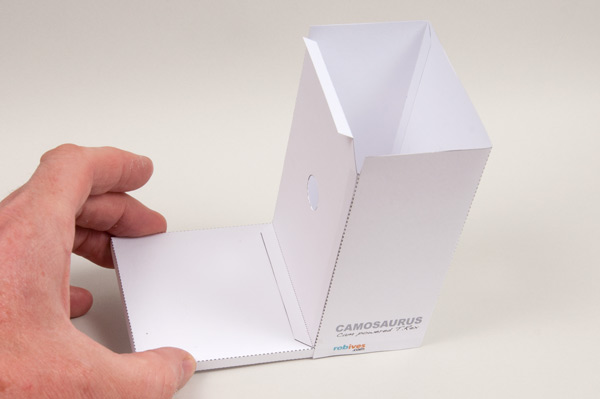
Glue the box body to the base. Make sure that it is straight and square.
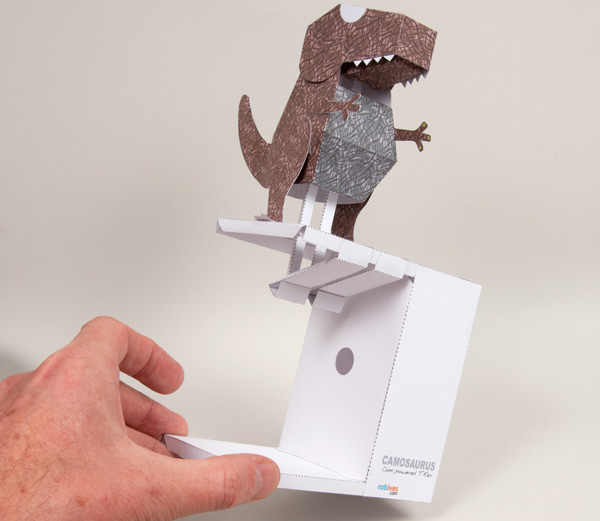
Glue the top to the box again making sure that it is straight and square.
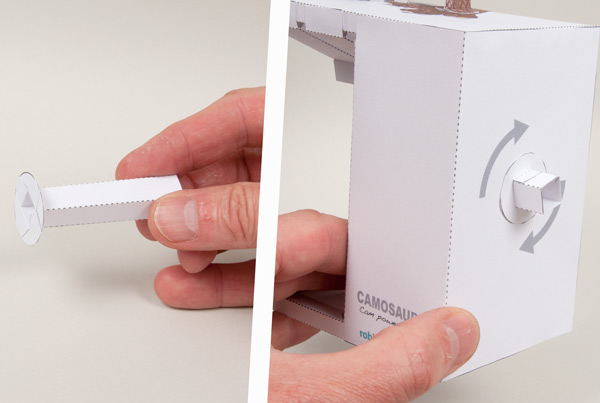
Glue together the drive shaft tube. Glue the washer to the end.
Thread the drive shaft through the holes in the box and fix the second washer into place. the drive shaft must be free to turn.
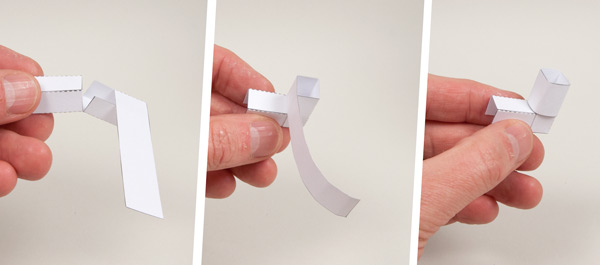
Assemble the handle in three steps. Fold over the two sections and glue to make square section tubes.
Fold on section into the other and glue them at right angles.
Roll round the long tab and glue it down.
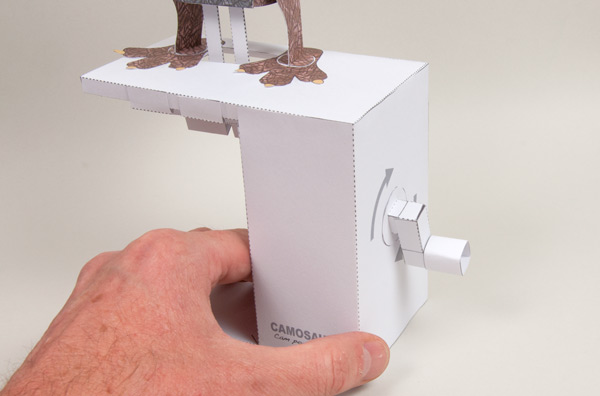
Glue the handle to the drive shaft.
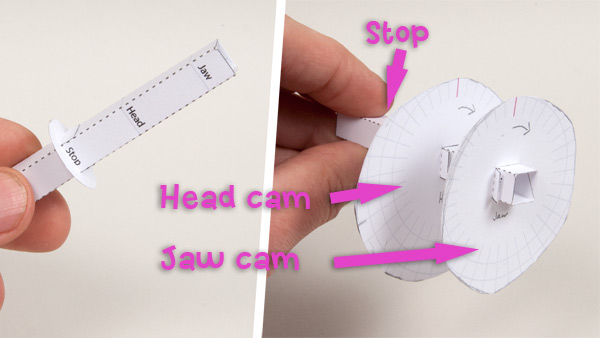
Making the interchangeable cams.
This project features easily interchangeable cams. Make a set for each story you want to tell. There are two cam sets already included in the pack as a well as a blank set of cams for you to design your own.
Fold round and glue together the cam shaft. Line up the stop with the grey line and glue it into place.
Thread the head cam into place on the shaft. If you are experimenting with cam profiles, don’t glue them on yet. Thread the lower jaw cam onto the shaft. Make sure that the read line on both are lined up so that the parts are in sync with each other.
Once you are happy with your cam design glue them to the shaft.
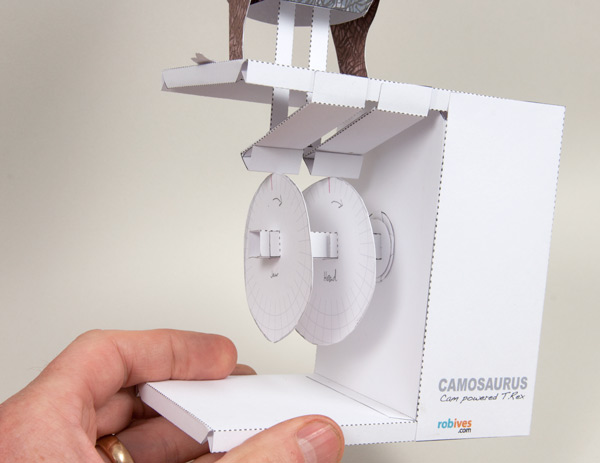
Lift the cam followers out of the way and thread the cam shaft into the drive shaft so that the stop butts up with the box.
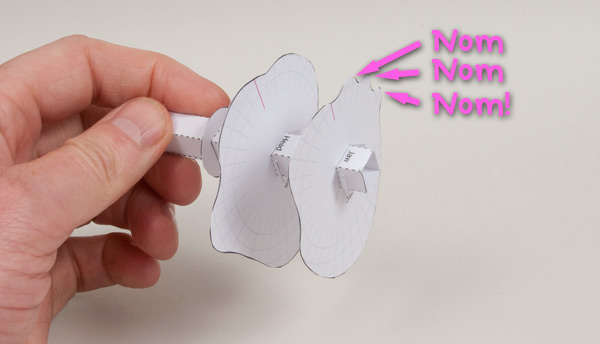
This cam pack makes the T.Rex eat. Nom nom nom!
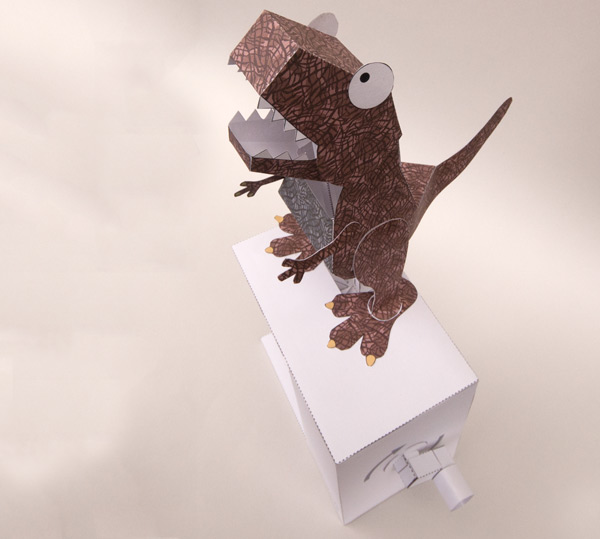
Don’t forget to complete the model by gluing the eyes into place otherwise it won’t be able to track down its prey!

