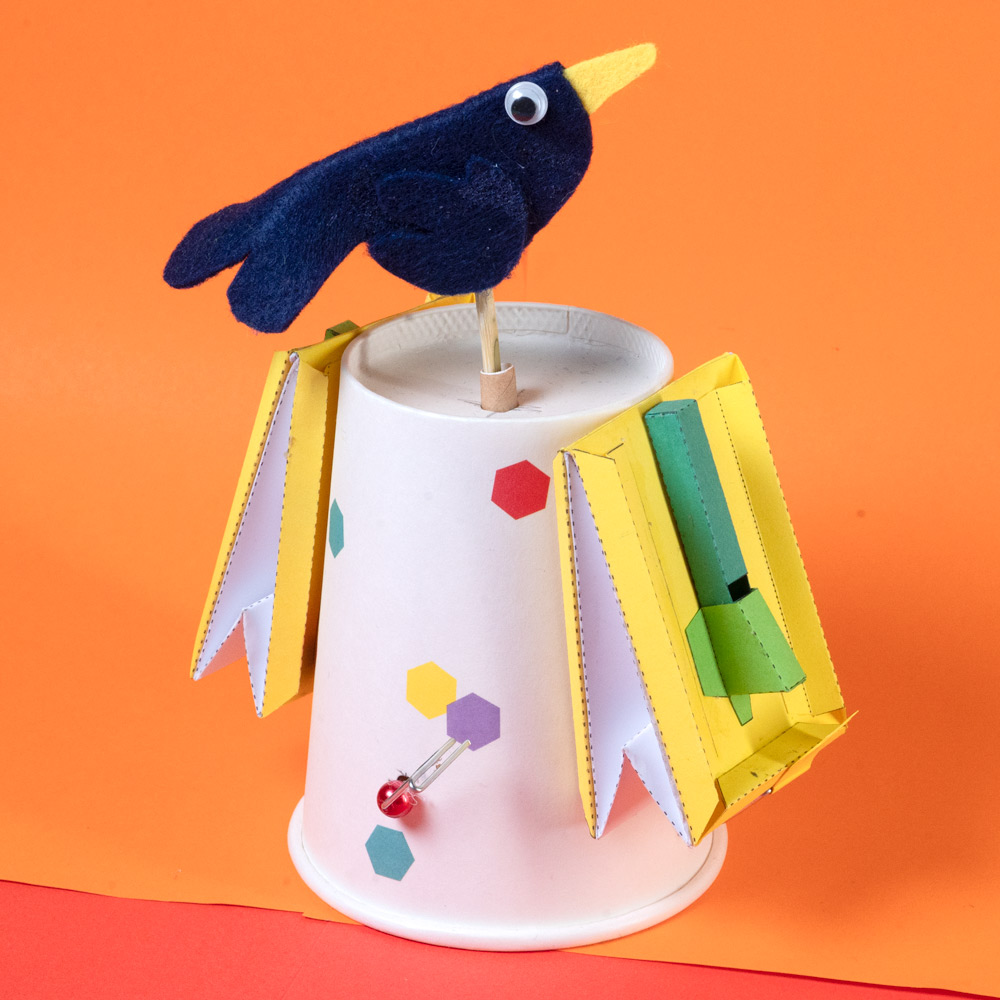
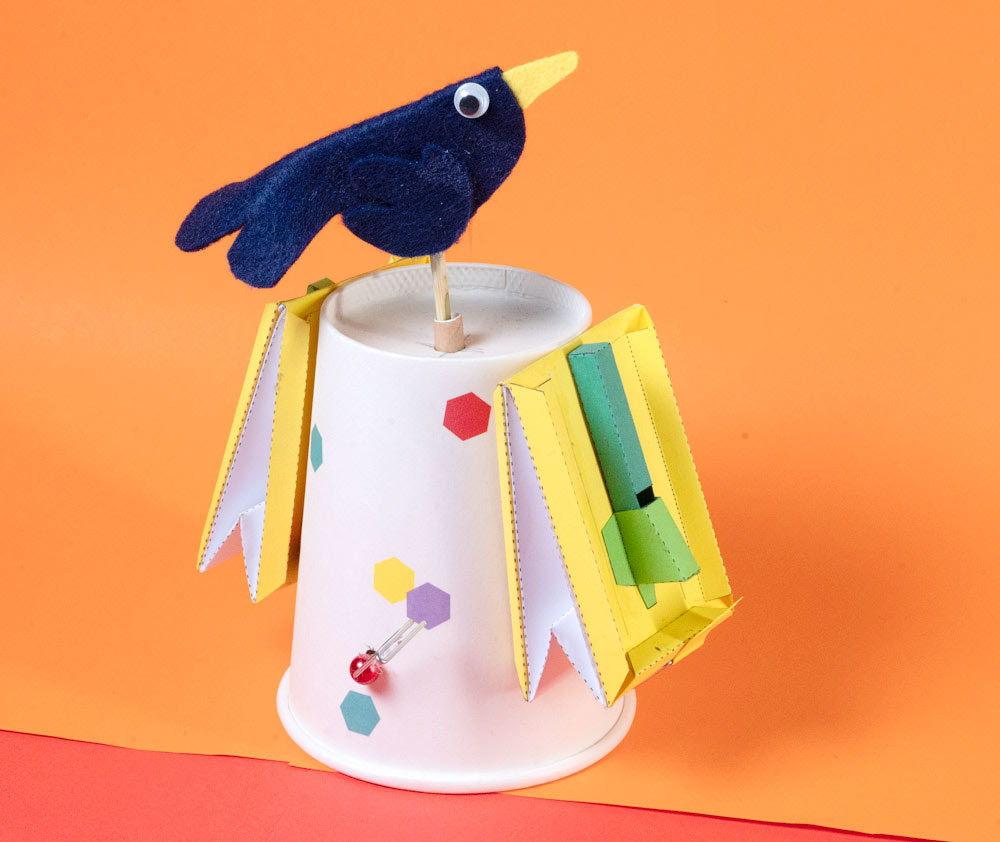
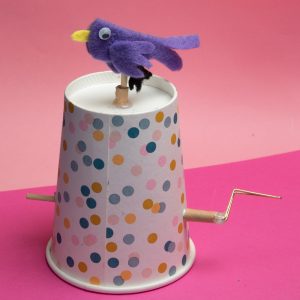
This project is a mash-up of the Felt Bird and Paper Whistle. I’ve changed the size of the paper bellows so that they fit neatly on the side of the paper cup. I’ve also changed the size of one whistle to give a two tone effect. You can download the parts by adding to the cart and checking out. Members can download the parts for free. Thanks for your support.
Think of this as more of a guide than full instructions. There is a lot of space for interpretation and experimentation so I’ve given a rough outline of what I did to make my tweety bird. Feel free to modify it to your hearts content. Check out the Felt Bird and Paper Whistle for more detailed instructions of the original projects.
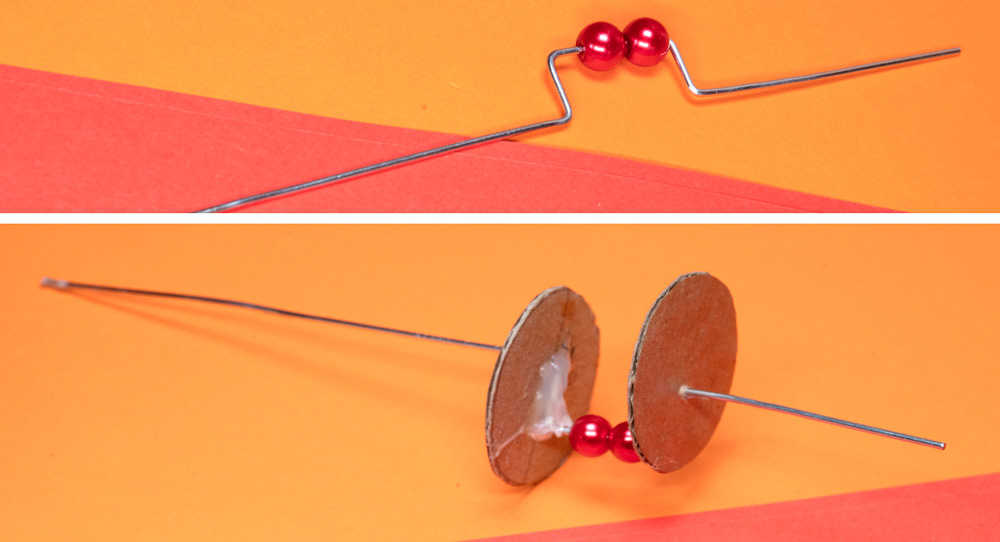
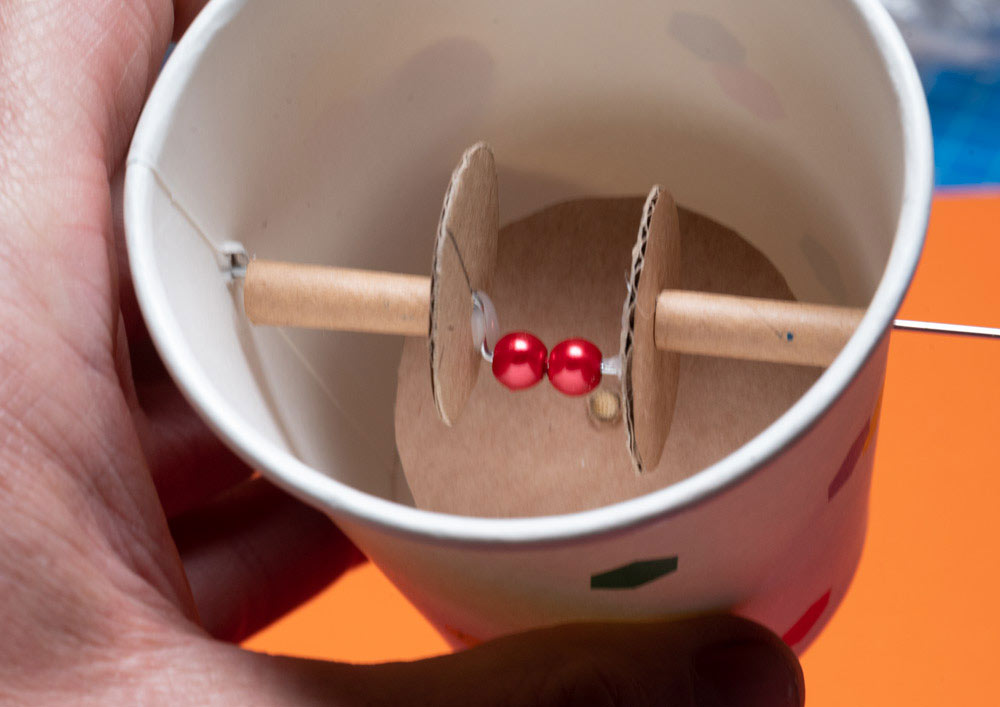
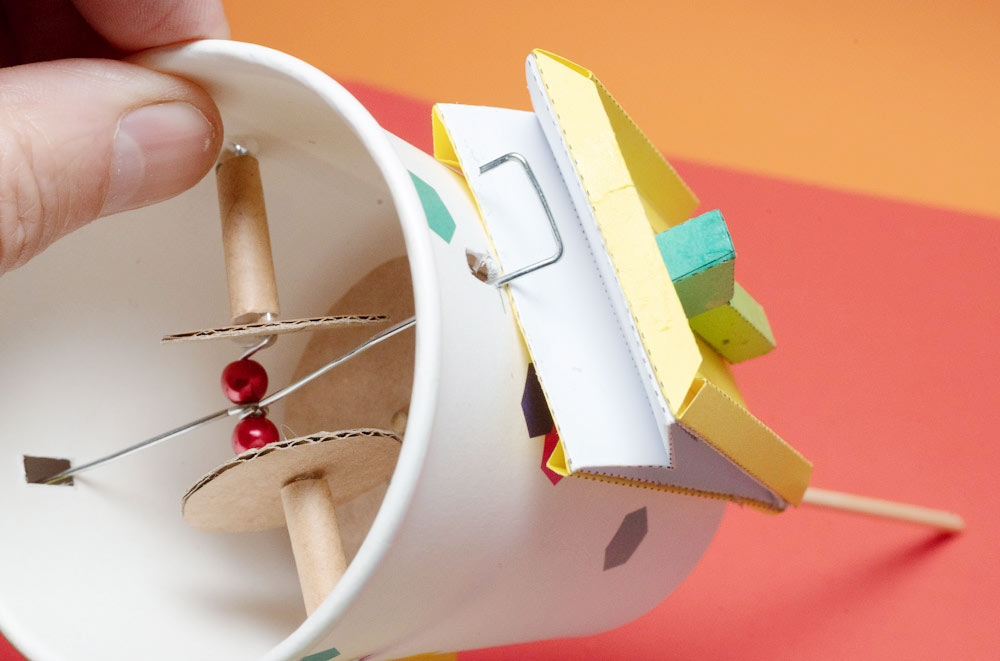
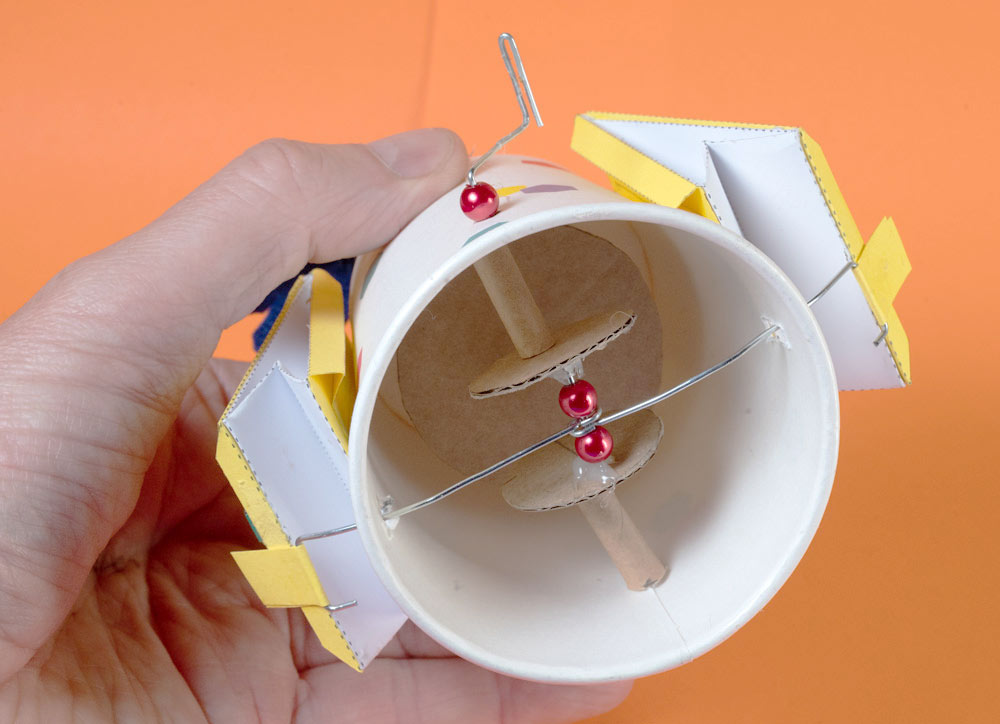
I’ve replaced the skewer axle from the Felt Bird project with a wire and bead crank then added the cams by hot gluing then to the wire. The cams will drive the bird, the wire crank will drive the two paper whistles.
With the twist plate in place in the cup I threaded the crank into place with short lengths of paper straw keeping it centred.
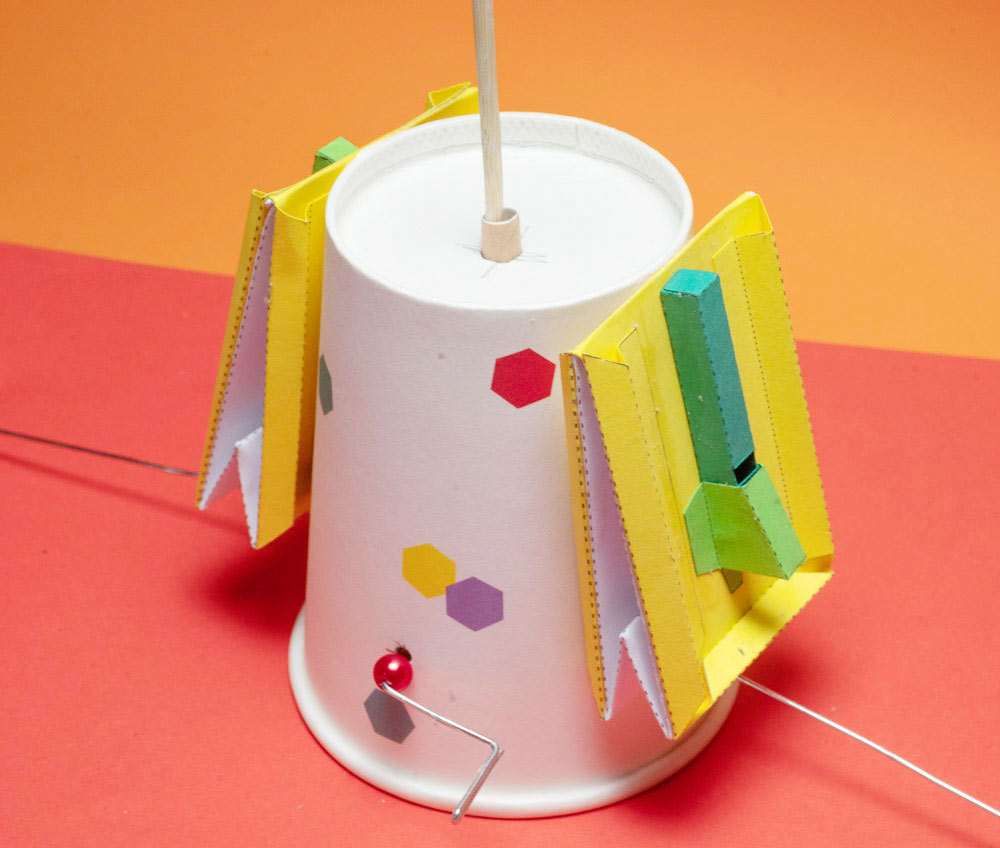
Having made up the two whistles, modified versions of the original paper whistle project, I glued them onto opposite sides of the cup. I then added a bead to the crank wire and shaped it into a handle.
I cut two slots, one on each side of the cup just below the whistles. On each side, I threaded a paperclip wire with a loop on the end and fastened it to the crank.
I folded the end of the paperclip wires as a place I could attach a paper tab which I used to connect to the bellows.
To finish off the tweeting mechanism I attached paper tabs to the paperclips and glued the ends to the ends of the bellows. I found I needed to curve the paperclip wire so that the mechanism didn’t catch in the slots.
I finished off the project by trimming the vertical shaft to length and adding a felt bird.
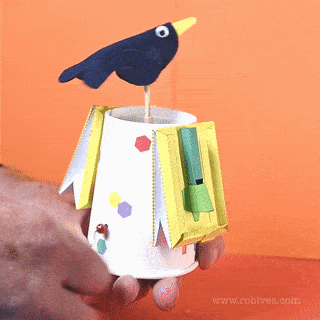
Turn the handle to make the bird bob about and tweet!