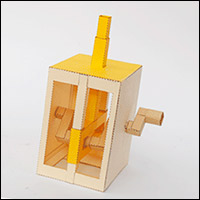
 Mk III Scotch Yoke Mechanism. I’ll be using this mech in the heart of forthcoming models, meanwhile I’m making available as a free download for members.
Let’s see what you Paper Ninjas can come up with!
Print out the parts onto thin card. Score along the dotted and dashed lines then carefully cut out the parts.
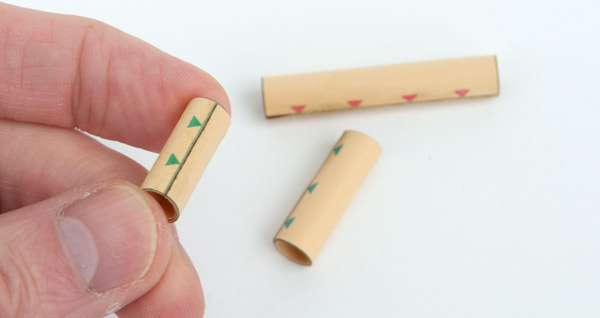
Roll up and glue the three pins and glue the ends down to make circular tubes.
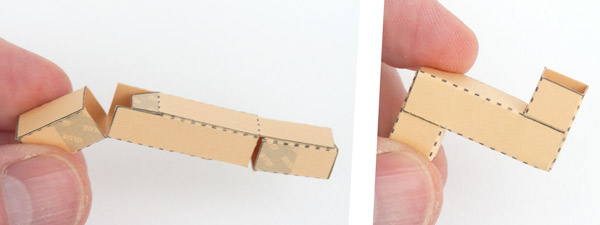
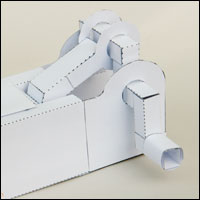
Fold up and complete the two crank parts.

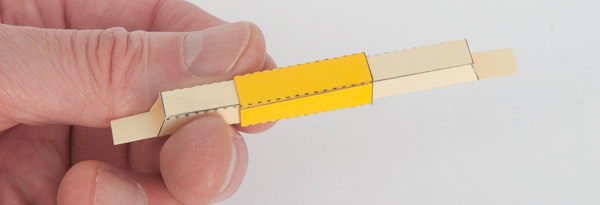
Fold up and complete the handle.
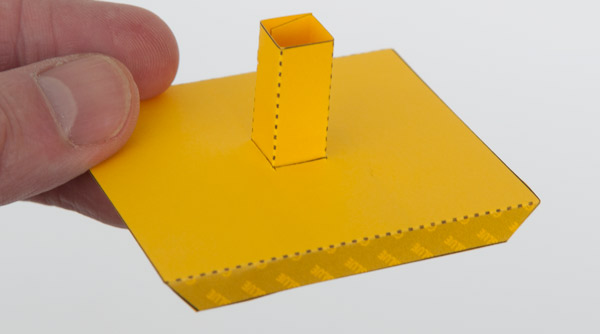
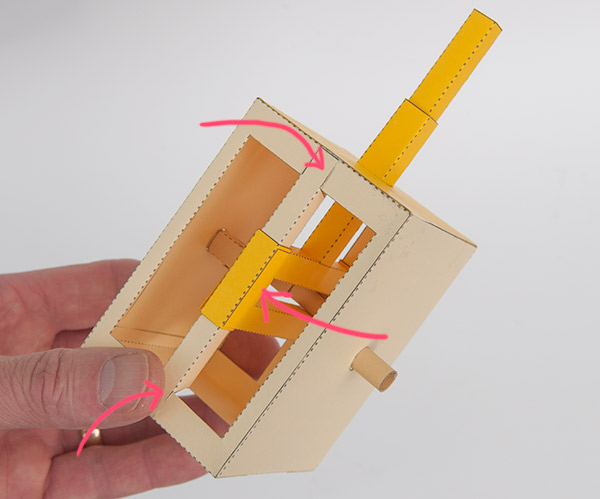
Glue the push-rod tube into the box top.
Glue the box top stiffeners across the underside of the box.
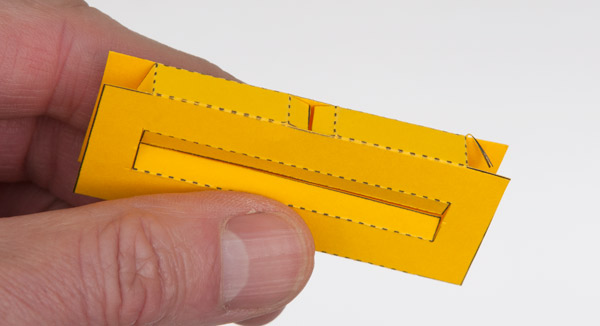
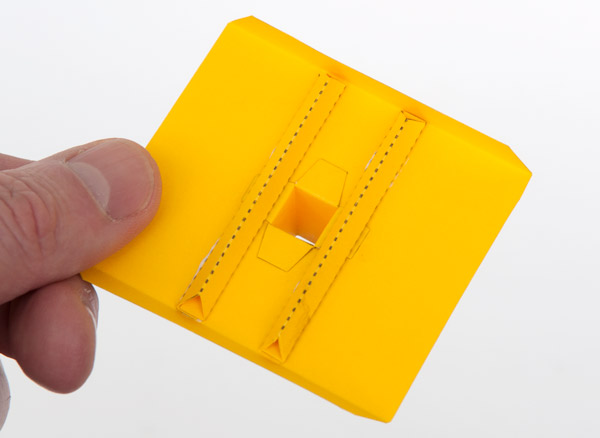
Assemble the yoke as shown.
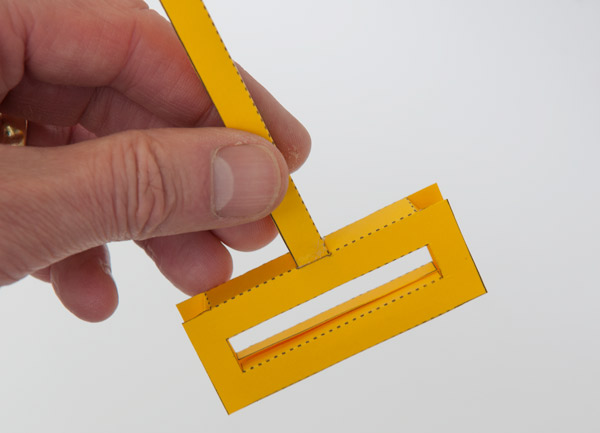
Glue in the pushrod so that it is at a right angle to the yoke and just touching the top fold-in flaps.
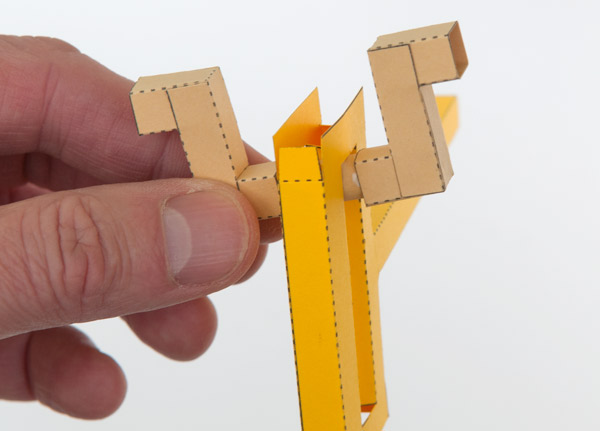
Thead the pin with four arrows through the yoke and glue the two crank pieces into place. Try to line them up as accurately as possible.
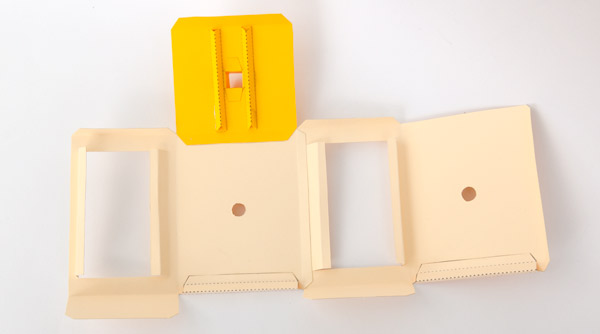
Fold up the bottom flaps on the box sides to make right angled triangles. Glue the two box sides together and glue on the box lid.
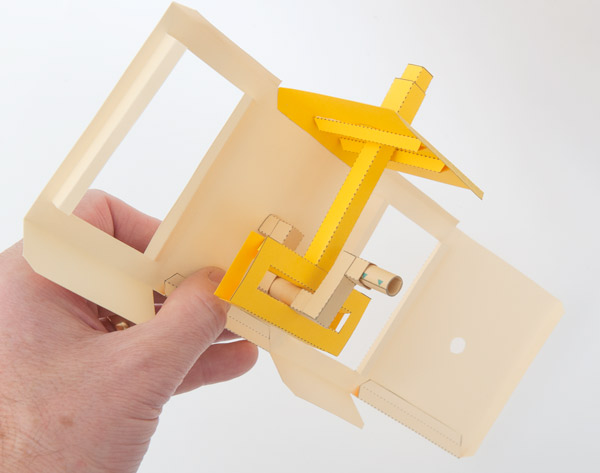
Add the two remaining pins to the crank assembly, one at each end. Thread the push-rod into place up through the hole in the box top. Fit one of the pins through the hole in the box side.

Fold the box round and glue all the flaps down to close the box.
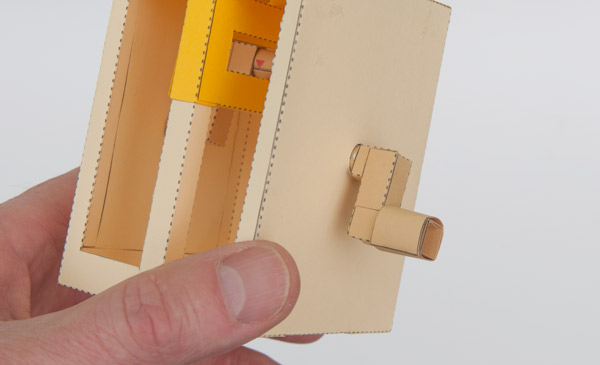
Glue down the flaps on the front and back of the box to the inside wall of the box.
Assemble the pillars and slides.
Fit the slides into the yoke as accurately as possible. Glue the pillar to the grey areas on the box front and back.
Complete the model by adding the handle.

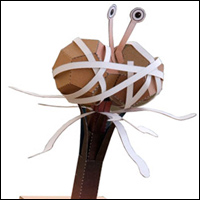
How will you use this new mechanism? Here’s my quick “Clockwork Frog” made with the scotch yoke mech, ratchet mechanism and some googly eyes.