

Blender is an open source (free!) 3D content creation suite. I'm planning on creating a series of tutorials on using Blender to design paper models. Visit the Blender site here to download your own version of the software to follow along.
Blender is available as a free download for a variety of different operating systems including Mac and Windows. As a Mac user I found that it takes a little extra setting up so to help other Mac users I've put together this short introduction.
Download the Blender file and install it in the usual way. I'm using version 2.58.

Start up Blender.
Because the Mac comes as standard with a single button mouse there are a few extra steps that need to be taken compared to the Windows version. These steps will only need to be followed once.
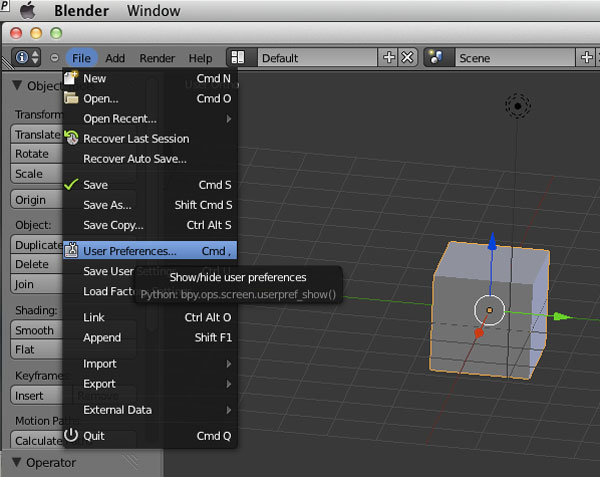
Once Blender is running, click on File -> User Preferences…
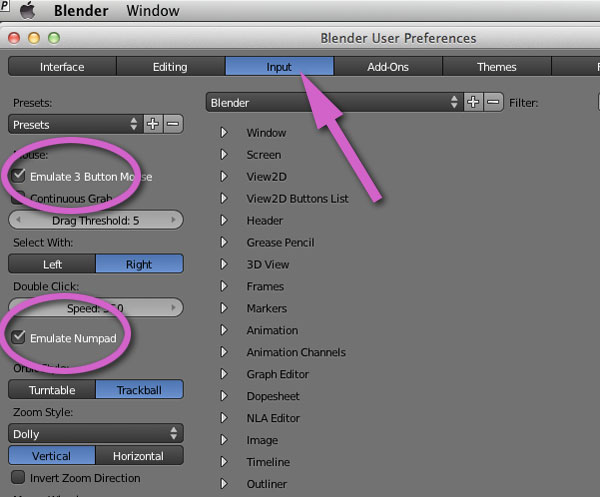
In the User Preferences window click on the Input tab.
Select the Emulate 3 Button Mouse check box.
Select the Emulate Numpad check box.
Click 'Save As Default' at the bottom of the window to save your new preferences.
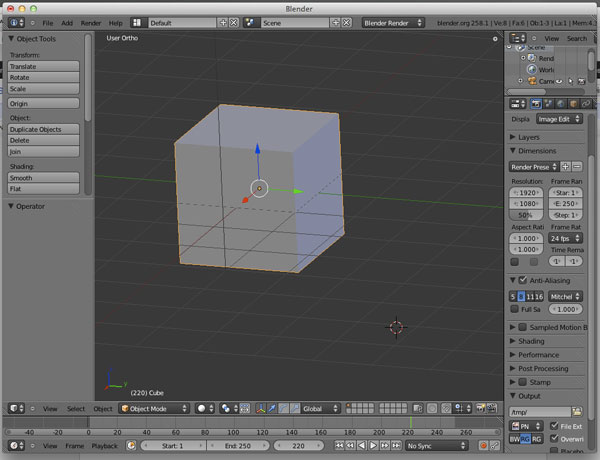
Blender is now set up for use on the Mac. When you first start up the program you are presented with a default cube in the centre of the screen. Try the commands below to get an idea of how to move your viewpoint around the object and create new objects.
<Alt>Click-drag to move around the object.
<Ctrl><Alt>Click-drag to zoom in and out
<Shift><Alt>Click-drag to pan. (Move side to side)
Command Click to select an object
G to grab an object which you can them move round the screen.
R to rotate an object
S to scale an object
You can constrain movement to an axis with these last three commands by clicking x,y or z
You can delete an object by selecting it and clicking x
<Shift><a>To insert a new object by choosing from the list.
That should get you started as a Mac user. Next time I'll explain how to create a simple net.
