

After completing the first draft it's time to commit the designs to a digital format. I use Adobe Illustrator to do my page layouts and to design the parts. At this point I have a working model made from card with some of the parts on the computer and some of them existing only in cardboard form. I do the transfer in a couple of different ways. If the shape is simple, for example a rectangle or the sides of a box, I measure the parts and then, using the grid in Illustrator, recreate the parts direct. If the shape is more complicated, like the legs in the tortoise, I'll flatten the parts out, pop them in the scanner, import the file into Illustrator and trace round them. (Let me know in the comments or by email if you are interested in more details on these steps and I'll do separate tutorial.)
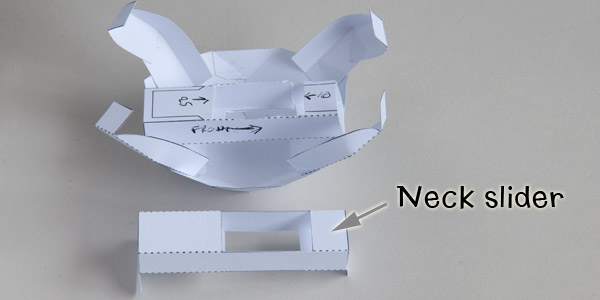
The first part to be transferred in this model was the neck slider. This is fairly straight forward as the shapes are all made from rectangles. I just measure and transfer. I was going to put a kind of triangular section on either side of the neck slider for added strength but this would have been over-engineering. It works just fine as it is.
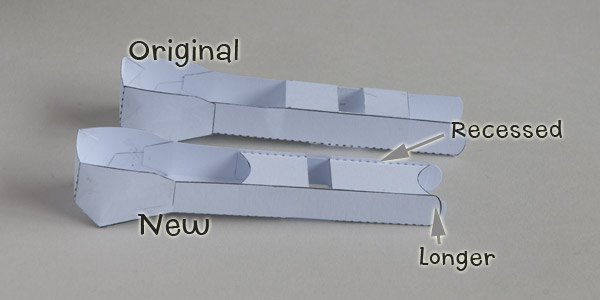
I made a few small changes to the head. There is is an insert with a slot in it used to drive the head back and forth. I shortened the sides on this so that the part is recessed by about a millimeter. This stops the edge of the slot catching on the edge of the cut out in the slider tube. I also made the curved ends slightly longer. This helps to keep the neck centred in the slider tube when it is out at full stretch.
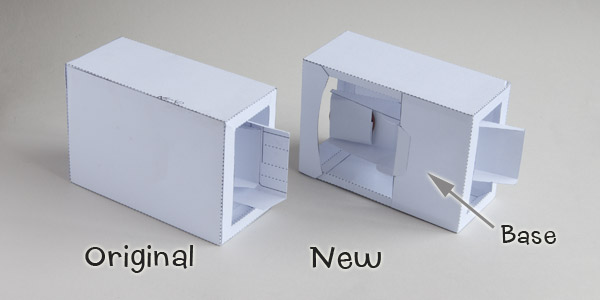
When I put the original base together I had had real problems actually threading the rocker part into place through the hole in the front of the box. To overcome this I decided to have an open base. This is a design I use quite often anyway for purely aesthetic reasons. The reason I'd gone for a full base was so that I had somewhere to glue the rocker. Ha.
The new design works reasonably well, though I still have to thread the rocker into place before I glue down the large flap on the base.
This type of design is one that I can transfer to the computer without using the scanner. Lots of parallel lines, rectangles and a little but of Pythagoras. Job done.

Those are the main parts of the model complete. When I held the tortoise body into place I realised that I'd have to extend the upright on the rocker a bit further. I did this by adding a 10mm tab, simply glued into place on the end of the upright.
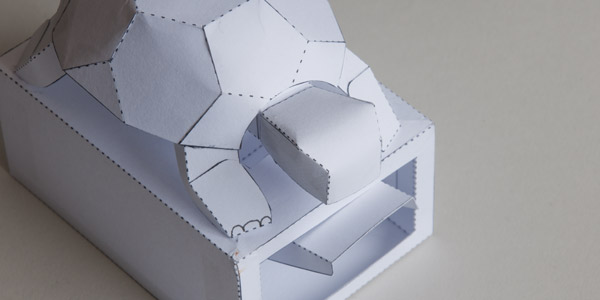
I completed the last of the parts by adding the legs and gluing the tortoise into place on the box top. Press the button on the front and the tortoise pops her head out of her shell. In the next stage I'll need to mark on the body where the legs fit. I'll also have to add markers on the box top for the feet.
Next step: Completing the layout and adding colour.
+++++
