
A picture is worth a thousand words. Moving pictures must be worth at least twice that. To that end, I'm creating a YouTube video explaining the best techniques for making paper toys from printing and aligning to scoring and cutting. The Agreeable Sheep seemed like the perfect subject for such a video but just needed a few small changes. And so, for your cutting and sticking pleasure, I present here, a slightly updated version for you to follow along with at home. YouTube video soon.
Print out the parts onto thin card (230 micron / 230 gsm is perfect)
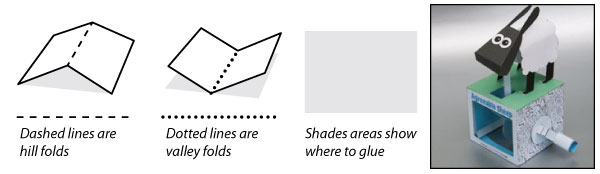
Score along the dotted and dashed lines then cut out the holes before carefully cutting out the parts of the model then follow the instructions for construction below.
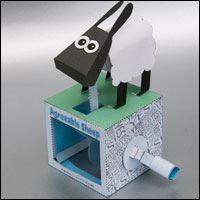
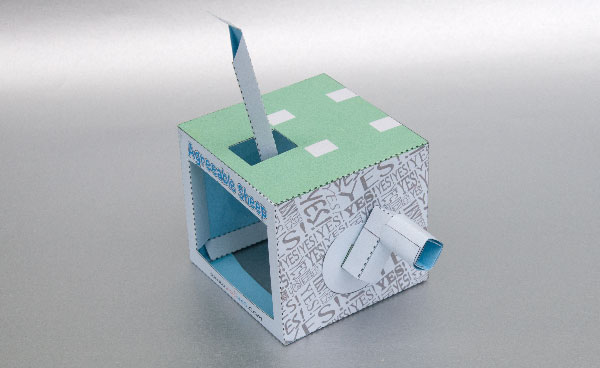
 Not one to stand out of the crowd, our woolly friend agrees with everything you say…
"Is this a good colour scheme?"
"Yes!"
"Would you like to go for a walk?"
"Yes!"
"Are you having a good time?"
"Yes!"
"Does my bum look big in this?" …probably best not to ask. With this agreeable model you need never get a second opinion again.
Baa baa baa!
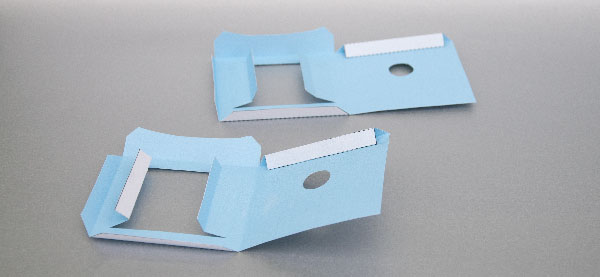
Fold up the two triangular sections on the box sides to make right angled triangles.
Glue the two box halves together.
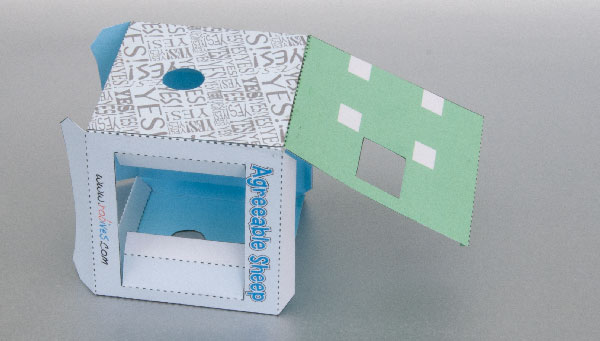
Glue on the lid. Note that the hole in the box top goes to the front of the model.
Fold the two flaps on the base down and glue them into place.
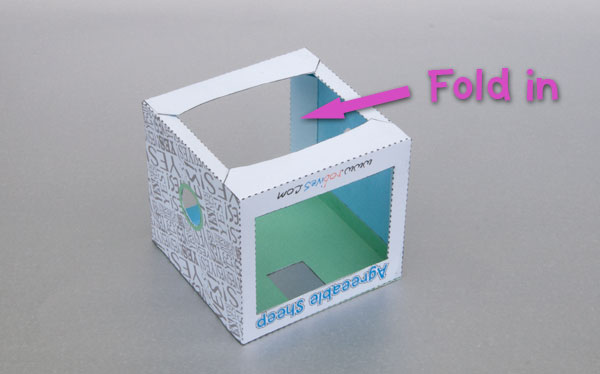
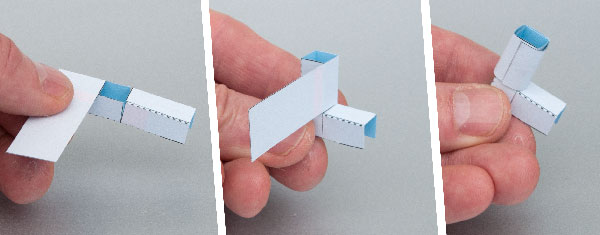
Fold in and glue the four vertical flaps to form triangular tubes one of which is arrowed above.
Fold up and glue together the body inner. Glue it to the inside of the body in the position shown.
Fold round and glue down the other side of the body.
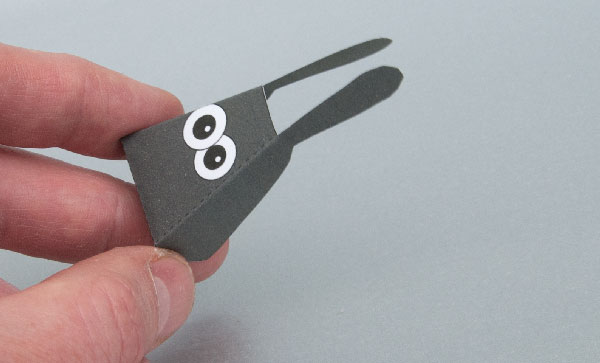
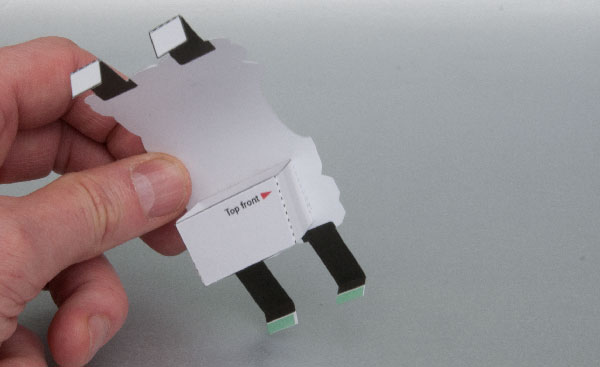
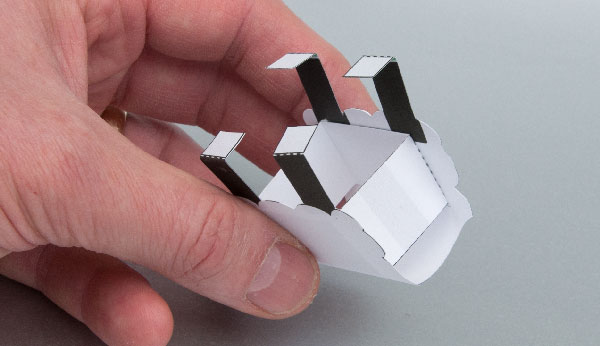
Fold up and assemble the head.
Glue the tab on the neck to the inside of the head.
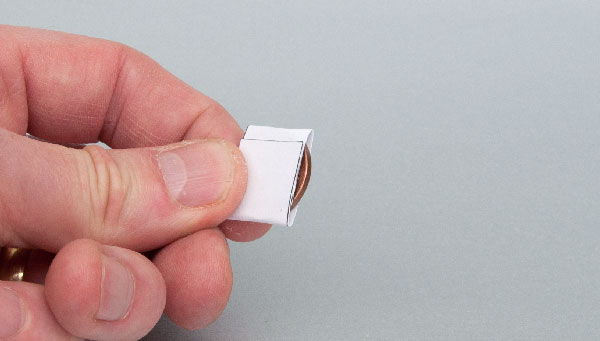
Fold the coin holder round a single 20mm diameter coin roughly 4 grams in weight (One UK Penny is perfect for the job)
Glue the penny to the inside of the cam follower then glue the cam follower closed.
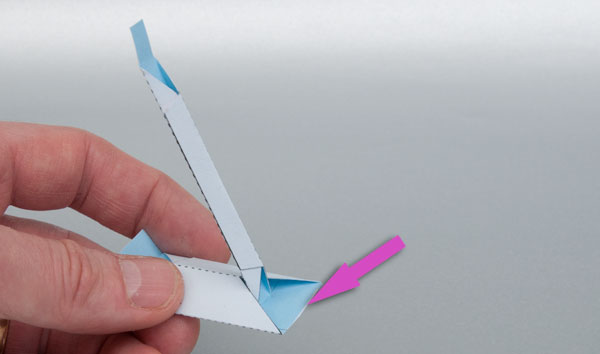
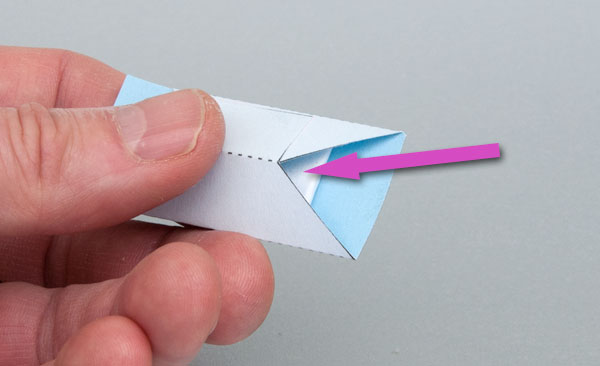
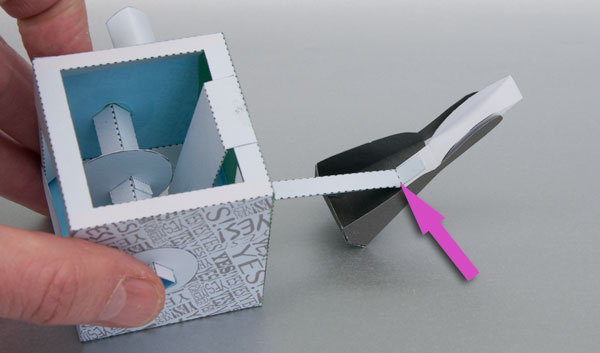
Assemble the push rod tube. Glue the large tab on the end of the push rod to the inside of the cam follower so that the edge is lined up with the edge of the cam follower arrowed above.

Thread the push rod up through the hole in the top of the box then glue the tab on the back of the cam follower to the back of the box as shown above.
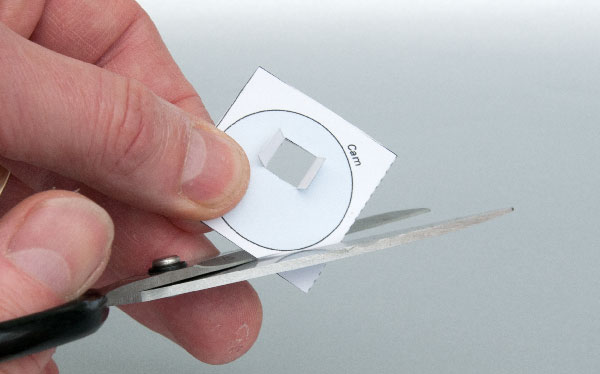
Fold of the cam to make double thickness card then carefully cut it out.
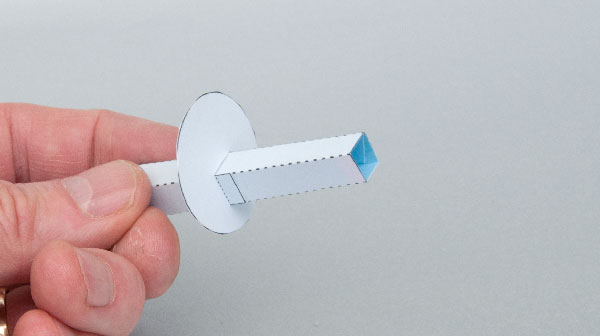
Assemble the axle and thread the cam onto it gluing it down onto the grey areas.
Thread the axle into the box lining up the green ends.
Assemble the handle in three steps. Fold up the two square sections. Glue one section into the other. Roll round and glue down the long tab.
Glue the washers to the axle then glue the handle into place.
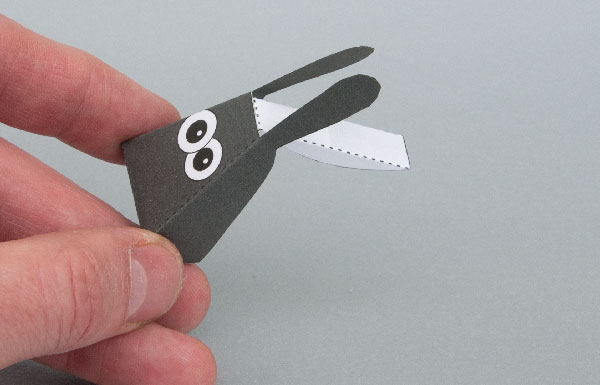
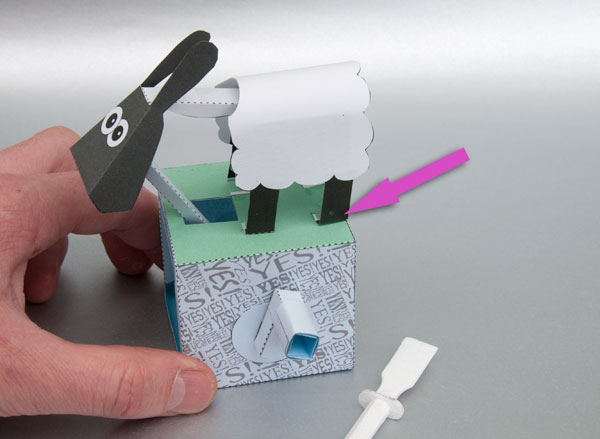
Glue the push rod to the head so that the crease in the tab lines up with the end of the neck tab arrowed.
Glue the four feet to the box using the grey pads for alignment.
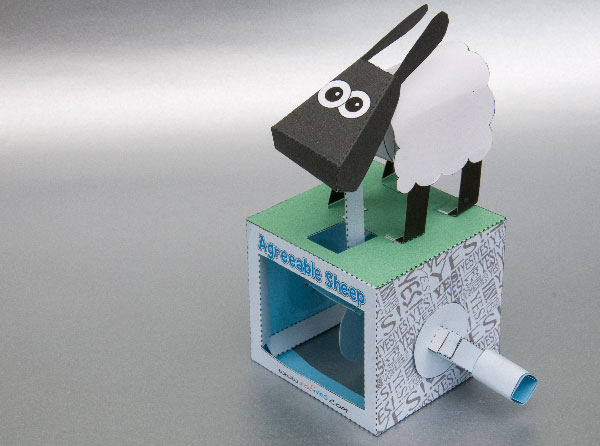
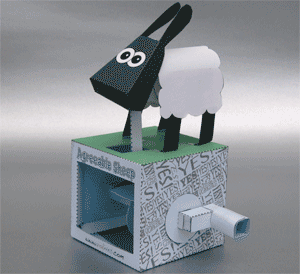
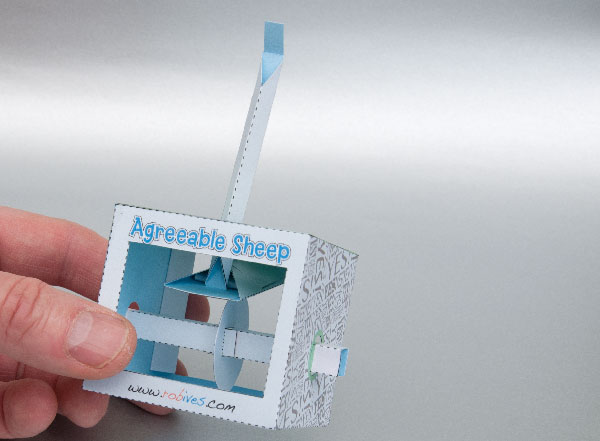
Complete the model by gluing the neck to the front of the body. Turn the handle to see the sheep nod.
Now that wasn't so bad was it?
What do you mean, "Yes"?
