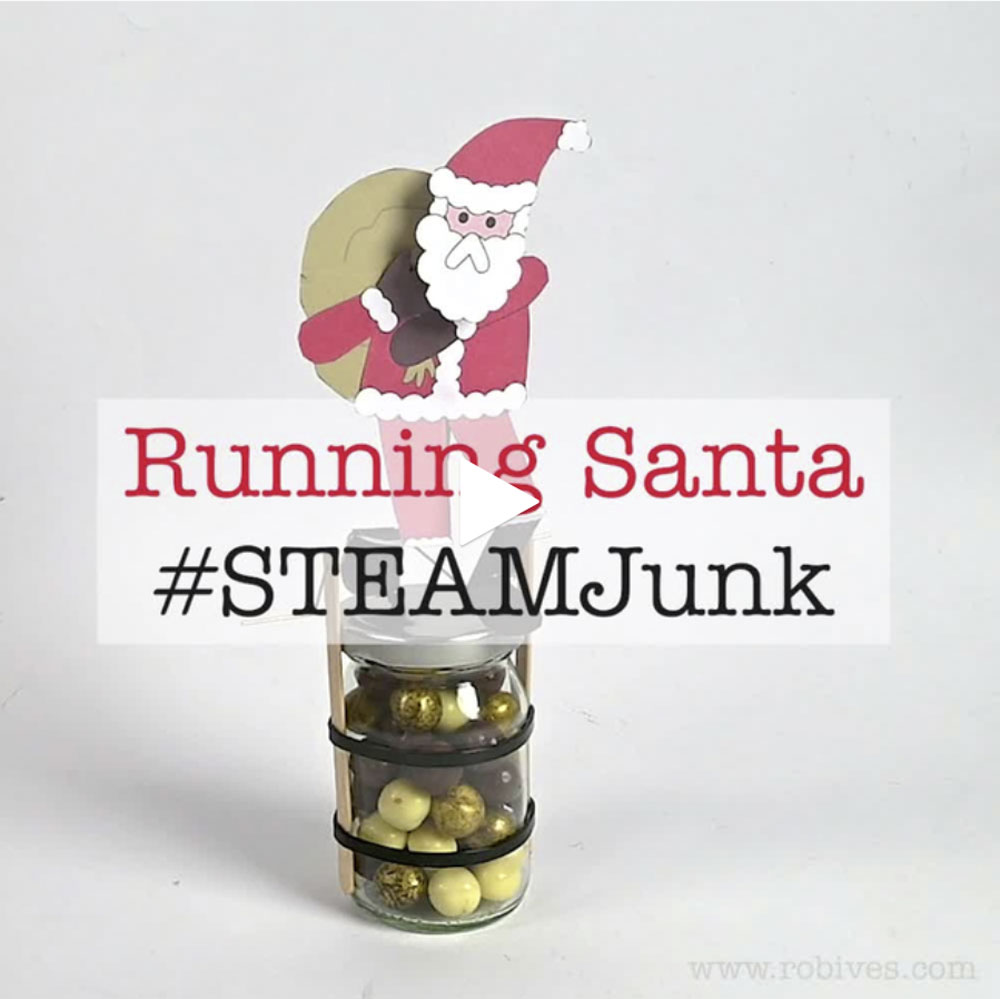
I came across this alternative way of using a ratchet as a drive mechanism. The lever on the right is the input. Pull it back and forth to intermittently drive the wheel forward. As the lever is pushed anti-clockwise it lifts the pawl out of the gear before turning it back leaving the gear wheel stationary. Pull the lever clockwise and the pawl re-engages before turning the wheel.
Keep up to date: Receive the latest blog post by email
Rate this post:
This animation demonstrates the movement of the two-toothed ratchet mechanism. The housing rocks back and forth, at the bottom of its throw the pawl clicks down and catches on the next ratchet tooth. As the housing moves back it pulls the ratchet gear with it. At the bottom of the mechanism is a second pawl that stops the gear rotating in the wrong direction.
USEFUL LINKS:
Five Tooth Ratchet Animation
Ratchet Mechanism
Ratchet Model (2)
Ratchet Model (3)
Keep up to date: Receive the latest blog post by email
Rate this post:
Become a Member for free
access to this and other members only projects on the site.See the Membership page for more details.
Already a Member? Log in Here

This mechanism is a two toothet ratchet. Pull the tab back and forth and the drive shaft turns half a turn each time. The mechanism can be used as a starting point for a variety of character based automata where the character is up/down, in/out, left/right etc. Members can download the model for free. Let me know if you come up with any interesting uses for this project. I'll write another blog post shortly with some ideas for how it could be used and I plan to crate a character based project with it shortly.
Print out the two pages onto thin card. (230 micron / 230 gsm) Score along the dotted lines and cut out the holes before carefully cutting out the parts.

Fold the gears in half and glue them down to make double thickness card. Once the glue is dry cut them out. Notice that the tabs in the middle aren't glued down.

One of the completed gears.

Fold the pawl housing sides over and glue down to make double thickness card. Once the glue is completely dry, cut out the hole with a sharp knife.

Glue the pawl housing top into place on one of the sides.

thread the gear onto the completed cam shaft and glue into place using the grey areas for alignment

Glue the two washers into place on the drive shaft. Note that the tabs are facing into the middle.

Thread the gear into the pawl housing. Notice from the picture above which way the pawl and the gear are aligned.

Glue the other side into place.

Glue the tab end onto the grey area on the pawl.

Assemble the triangular sections of the box side as shown above.

Glue the box back/base with the various attachments to the box side

Glue the tab from the second box side to the box but don't fold it into place yet. Glue the two guides into place back to back. The tabs on the guides should line up with the corners of the box.

Thread the ratchet assembly into place as shown in the picture above

Fold up and glue down the second box side.

Fold over the two triangular section pieces over the top of the box and glue their ends accurately to the grey areas on the box side.

Make up th crank as shown above. This is an optional piece which could be used to drive a character on the top of your model.

Glue the crank into place.

Once the glue is dry pull the tab back and forth and the drive will rotate half a turn for each pull with a satisfying "Tick - Tock" !
Keep up to date: Receive the latest blog post by email
Rate this post:
Become a Member for free
access to this and other members only projects on the site.See the Membership page for more details.
Already a Member? Log in Here

This mechanism uses a ratchet to turn a wheel. Pull the tab and the wheel advances by one tooth. Three pulls for a full turn. Members can download the parts to this project for free.
Print out the parts onto thin card (230 micron / 230 gsm) Score along the dotted lines and cut out the holes before carefully cutting out the parts. Use PVA white school glue to stick the parts together.

Fold the gear wheel in two and glue it back to back to make it double thickness. Notice that the tabs aren't glued. Once the glue is dry carefully cut out the gear.

Fold up and glue together the axle. Glue the gear to the centre of the axle using the grey areas for alignment. Glue two of the washers in place on the axle as shown.

Fold the two pawl supports in half and glue them down to make double thickness card. Let the glue dry then carefully cut the hole out with a sharp knife.

Glue the pawl piece to one of the pawl supports.

Thread the axle through the hole in the pawl support. Use the picture above to make sure that the gear is the right way round. To test, the gear should turn one way only with the pawl clicking as the gear turns.
Add the second pawl support into place. Glue the remaining washers to the ends of the axle with the tabs pointing inwards.

Glue the pull tab to the pawl housing on the grey area.

Fold round the tab on the base of the box to make a triangular tube section. Repeat on the second box part.

Glue the pawl support to the inside of the box in he position shown above. Glue the secondary pawl into place on the grey area on the pawl support.

Glue the box lid into place on the box with the larger vertical opening. Notice that the slot in the box top is closest to the box.

Glue the two box halves together.

Fold the box round the axle with the ends in the holes. Make sure that you get the axle in the right way round, use the picture for alignment. Glue the box closed.

Thread the pull tab up through the slot in the box top. Glue the lid down. Glue the tabs on the base into place. Fold the vertical tabs inwards and glue them to the inside of the box.

Once the glue is dry, pull the tab up and down and the gear should advance one tooth at a time.

The model will also work lying on its side. Glue the coloured wheel onto the axle to more clearly see the rotation.
The ratchet can be the starting point for your own animated models or simply as a model demonstrating an interesting mechanism. Let me know what you create!
Keep up to date: Receive the latest blog post by email
Rate this post:

Further research and development on ratchet driven project. I had made a five tooth and three tooth ratchet which I am trying to drive. Lower tooth count wheels have their own set of difficulties. If you look at the three tooth wheel above you'll see that a pawl pulling from a fixed point to one side would soon loose grip on the tooth before the wheel has turned the required 120°.

To overcome this I've made the pawl move round with the wheel. Instead of being fixed in one place to the side of the wheel, the pawl is mounted in a housing which moves round the same axle as the wheel.

With the housing complete it works like a treat!

This whole assemble fits inside a box with a secondary pawl stopping the wheel turning backwards.

Initially in this experimental model, I have attached a long tab to the outside of the pawl housing which threads through a hole in the box top. By pulling the tab up and down I can make the wheel turn in third turns.

As you can see in the picture above, the long tabs has quite a range of travel moving up and down by over 50mm. I could link the long tab to a crank so that by turning a handle on the crank the main drive wheel turns at one third the rate or I could use it as it is it a handle protruding through the box top.

The same mechanism works just as well with a five toothed wheel with only a few small changes. This mechanism has all sorts of possible uses as a starting point for different character based projects. I'll put the parts together into a download so that members can have a go.
Keep up to date: Receive the latest blog post by email
Rate this post:
A five toothed ratchet mechanism soon to be implemented in card.
As the housing moves back and forth the pawl drops into the tooth and advances the gear one fifth of a turn before returning to engage the next tooth.
The second pawl, at the bottom of the picture, stops the gear from rotating back as the housing moves back to engage the next tooth. Without it the gear would just move back and forth.
USEFUL LINKS:
Two Tooth Ratchet Animation
Ratchet Mechanism
Ratchet Model (2)
Ratchet Model (3)
Keep up to date: Receive the latest blog post by email
Rate this post:
A flag waving device to deploy at the upcoming royal wedding. Effortless celebration.
Working mechanism prototype for a new project.
Keep up to date: Receive the latest blog post by email
Rate this post:
Become a Member for free
access to this and other files on the site.See the Membership page for more details.
Already a Member? Log in Here

The Archimedes' Screw is a device used to raise water. Invented thousands of years ago, it is a hollow tube with a spiral thread running along its cntre. One end is dipped into a liquid, the shaft is turned and the liquid travels up the tube eventually spilling out of the top. This version is made of card so can't be used with water. Luckily the Archimedes' Screw works just as well with sugar, salt or sand.
Members can download the parts for free, non members can download them for a small fee. Print out the parts onto thin card (230 micron / 230 gsm) Score along the dotted lines and cut out the holes before cutting out the parts. Use PVA (white school glue) to glue the parts together.

Fold round and glue together the square shaft. Starting from one end, glue the vanes to the angled colours lines. Note that there are two spirals running down the shaft.


Roll the tube outer round the shaft and glue in into place. Note that there is no need to glue the outer to the edges of the vanes as friction will hold it into place so long as it is wrapped tightly.

Fold round and glue down the tabs to making a triangular tube, these will make the edges rigid.

Fold up and glue the box together the box as shown above.

Glue one of the washers to the short end of the shaft so that the tabs touch the end of the shaft. Thread the shaft through the hole in the end of the box.

Glue the other washer onto the other side. Make sure that you don't get any glue on the box, the shaft mush be free to rotate.

Fold round and glue together the end piece.

Thread the end over the shaft as shown and glue it into place on the end of the box.

Glue up the four tabs on the outer box to make triangular tubes as shown above. Glue one side of the outer box to the marked grey area on the box-inner.

Fold the box-outer round and glue it down on the grey area on the other side of the box-inner.

Fold in and glue down the two flaps, front and back.

Assemble the handle in three steps:
Fold round and glue down the two sections to make square section tubes.
Fold one section into the other and glue it down.
Roll the long tab round and glue it down.

Complete the model by gluing the handle into place.
Fill the end of the box with sugar, salt or sand. Turn the handle and it will be transported up the tube to spill out of the end.
Fill the box with sugar and you can use it as a device to deliver measured doses of sweetness to your coffee. I used a stack of books to raise the Archimedes' Screw to a suitable height but you could construct a tall base as part of the model.
Look at the crema on that espresso! Hmmm!
Keep up to date: Receive the latest blog post by email
Rate this post:

Regular visitor Tom Beutel sent in these pictures of his mechanism design. He plans to use the model as the starting point for other designs. Train, twirling ballerina, that sort of thing. The larger gear has 16 teeth, the smaller one eight, giving a ratio of 2:1. Two turns of the handle to one turn of the vertical shaft. Tom says that it runs nice and smoothly. I'm looking forward to seeing how he uses the mechanism in future models - nice work Tom!
Keep up to date: Receive the latest blog post by email
Rate this post:
I've been experimenting with the pendulum mechanism that I'm using in the forthcoming dragonfly. I'm wanting to make the pendulum move faster to make the wings flutter faster. In the current model (left) the coin is hanging vertically and the centre of gravity it roughly 30mm from the hinge. To make the pendulum swing faster I need to move the coin closer to the hinge. Also, there is a problem with design in that the hinge, because it is horizonal, tends to peel apart because of the weight of the coin.
To move the coin closer to the hinge I have rotated it by 90° so that it lies flat. I've also made the hinge vertical, that way it wont peel apart. Two birds, one stone. The pendulum length is now roughly 7mm, about a short as I can get it I reckon!

This is what it looks like in position

and here is the top view showing where the wing linkages attach. One nice side effect of this design it the base can be really thin, as little as 20mm.
Ooo look! 400th blog post on robives.com
Keep up to date: Receive the latest blog post by email
Rate this post:


