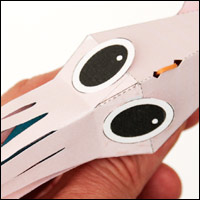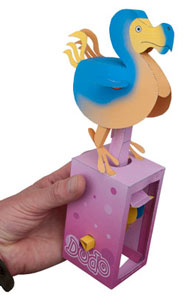
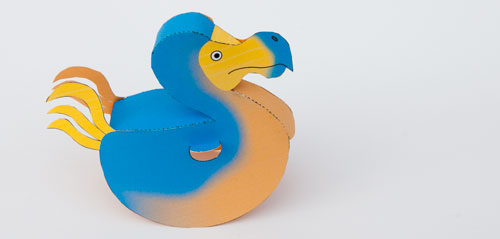
 Back from beyond the brink of extinction, the paper Dodo once again walks the earth.
In this model the Dodo, flightless though it is, tries to fly. Quick burst of wing flapping fail to lift the unhappy bird from the box, but that doesn’t stop her trying.
Follow the fully illustrated instructions to resurect your very own paper Dodo.
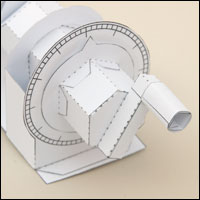
<style=”clear:both;”>The Dodo model uses an interesting mix of crank-slider and cam to tell its story. A fascinating mix of mechanism and extinction!
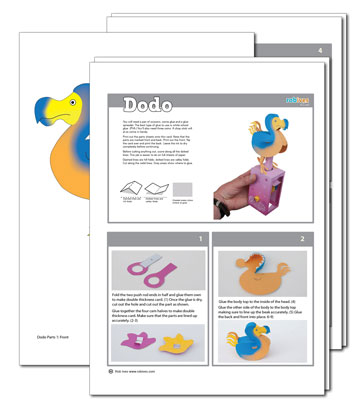
The Dodo is available for members to download at the end of this post. Make sure that you are logged in!
You will need a pair of scissors, some glue and a glue spreader. The best type of glue to use is white school glue (PVA.) You’ll also need two coins.
Print out the parts sheets onto thin card. Note that the parts are marked front and back. Print out the front, flip the card over and print the back. Leave the ink to dry completely before continuing.
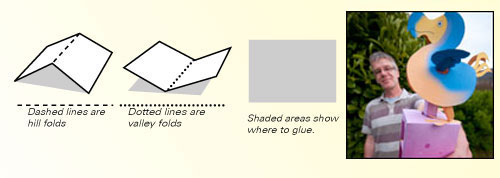
Before cutting anything out, score along all the dotted lines. This job is easier to do on full sheets of paper.
Dashed lines are hill folds, dotted lines are valley folds. Cut along the solid lines. Grey areas show where to glue.
Fold the two push rod ends in half and glue them own to make double thickness card. (1) Once the glue is dry, cut out the hole and cut out the part as shown.
Glue together the four cam halves to make double thickness card. Make sure that the parts are lined up accurately. (2-3)
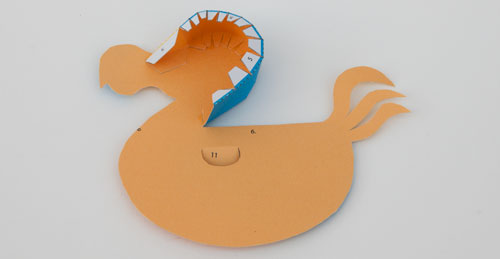
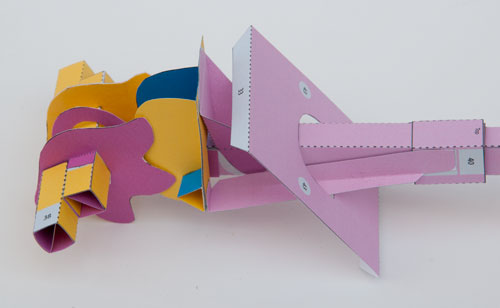
Glue the body top to the inside of the head. (4)
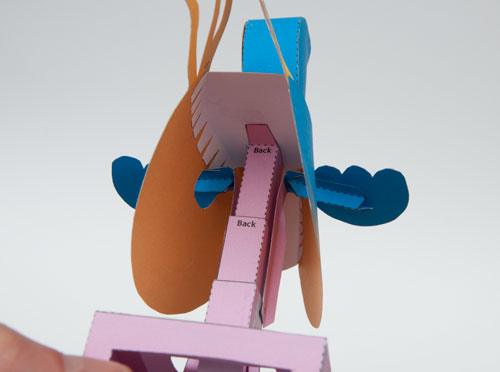
Glue the other side of the body to the body top making sure to line up the beak accurately. (5) Glue the back and front into place. 6-9)
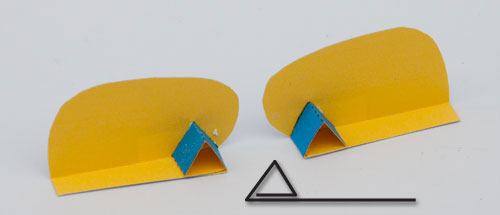
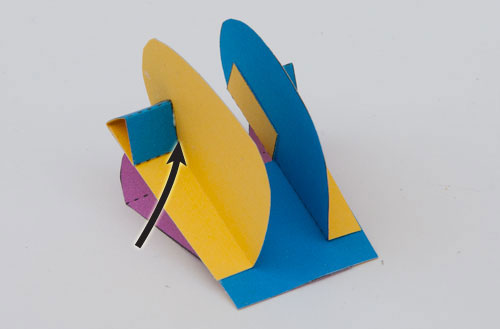
Glue the wing stiffeners onto the back of the wings as shown. (10)
Thread the two wings through the holes in the body sides and glue them into place. (11)
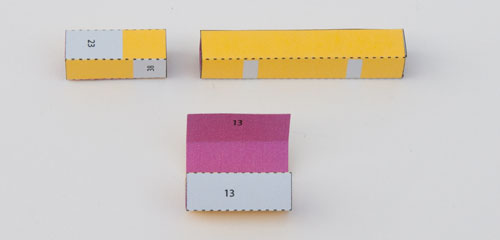
Glue together the three cam shaft parts as shown above. (12-13) The diagonal piece adds rigidity to the shaft. Don’t glue them all together yet.
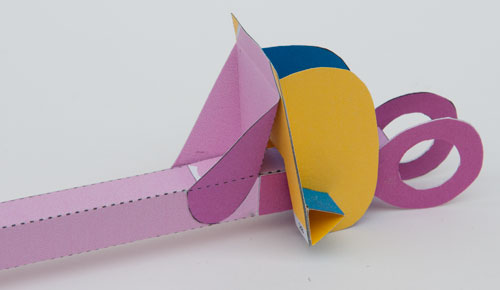
Fold round and glue together the three parts of the main push rod, the push rod (14), the slider tube (15) and the collar(16)

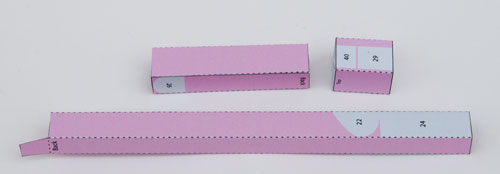
Glue the cam follower and cam follower support together. (17) On the marked areas should be glued, the rest must be free to move.
Assemble the two cam follower sides as shown below. (18)
Glue the cam follower sides into place on the cam follower. (19) Make sure that the edges of the triangle part are glued to the side of the cam follower sides where the arrow is pointing.(18)
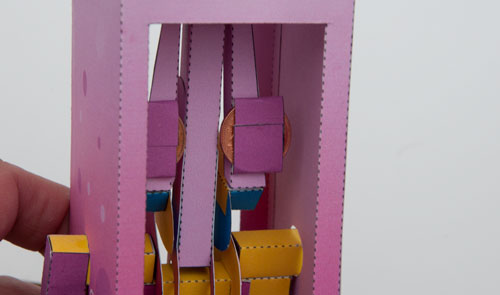
Glue the cam follower assembly to the push rod using the grey areas for alignment. (21-22) Make sure that these parts are straight and true before the glue dries. The cam follower must be free to move up an down without binding on the push rod ends.
Glue together the first two parts of the cam shaft. (23) Slide the first cam into place on the long shaft. Use the A and B for alignment. Make sure that the side with the two tabs is on the outside as shown in the picture above.
Thread the cam shaft through the holes in the push rod. Use the picture to ensure that the parts are lined up in the correct direction. Slide the second cam into place on the cam shaft. Make sure that it is parallel to the first cam. Glue the remaining cam shaft into place (25) The cam shaft should be free to rotate.
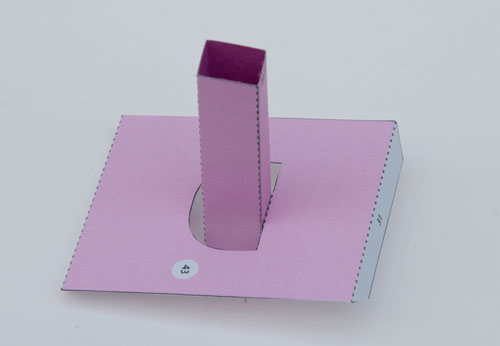
Glue the slider tube into place on the box top tab. (26)
Glue the linkages to the end of the cam follower. (27-28) Thread the push rod top up through the slider tube. Make sure that the backs are aligned. Slip the collar into place. (Back to the back!) Glue the linkages to the collar. (29)
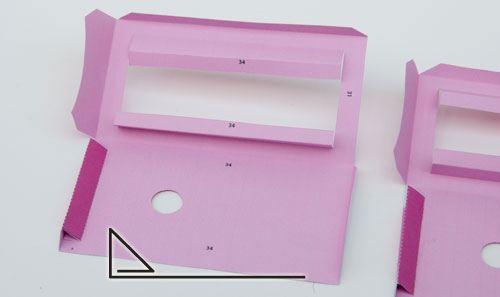
With both of the box sides, fold round and glue the bottom tab to make a triangular section tube. (30) This will make the bottom of the box rigid and strong.
Fit the box top to the appropriate box side. (31) Glue the two sides together. (32) Fold the box round the cam shaft and glue it together whilst threading the cam shaft ends through the holes in the side of the box. Glue the box together. (33) Fold in the four flaps inside the box and glue to make strong triangle sections. (34) Glue the base flaps down.

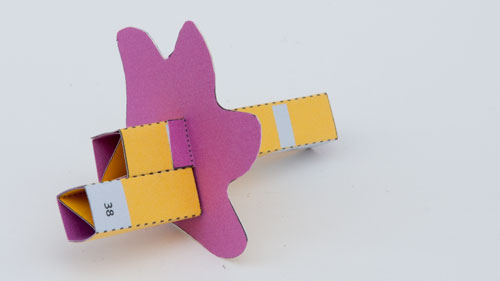
Make the handle in three steps:
Fold round the two halves to make square sections (35)
Fold the halves into each other and glue. (36)
Roll round the long tab and glue it down. (37)
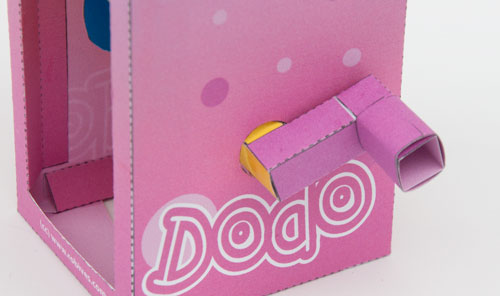
Glue the handle into place. (38)
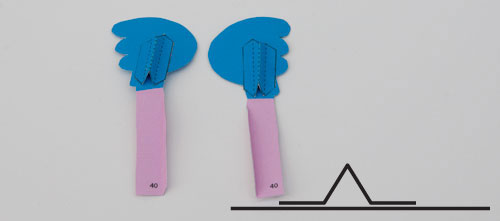
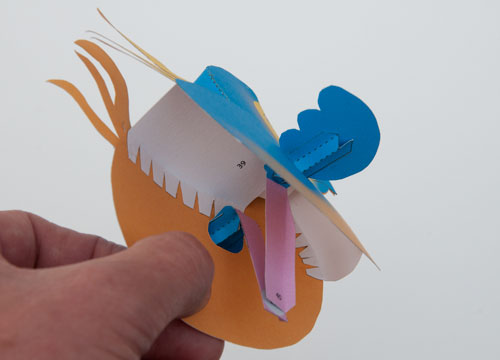
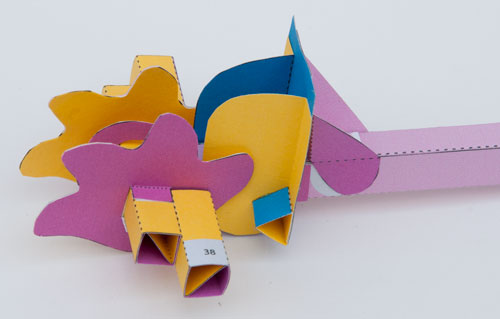
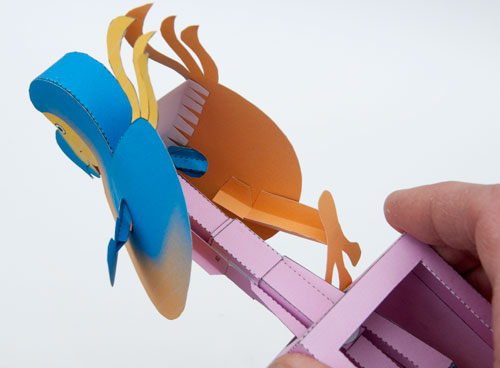
Glue the Dodo to the top of the push rod. (39) Glue the ends of the wings push rod to the collar. (40)
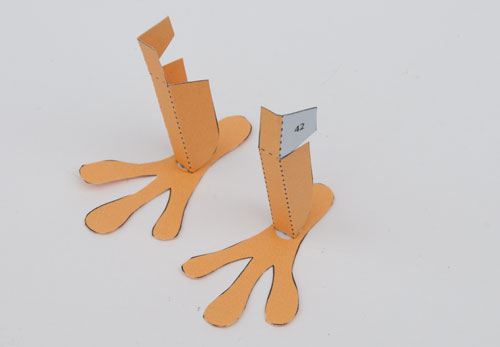
Glue the legs to the feet. (41)
Turn the handle until the Dodo is at its lowest position. With the feet flat to the box top glue the middle toe to the box top and the leg top to the inside of the body. Repeat with the other leg.
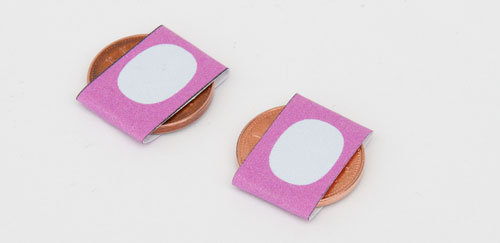
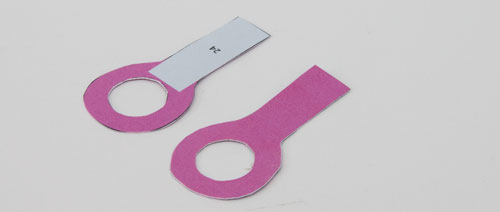
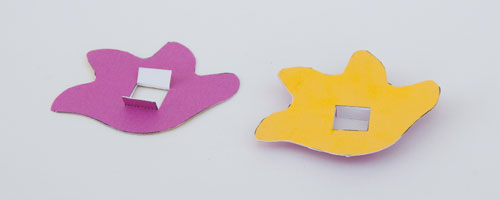
Fold the coin holders round two 20mm coins and glue them down.
Glue the two coins to the linkages. This gives weight to the cam followers and helps it accurately follow the cam.
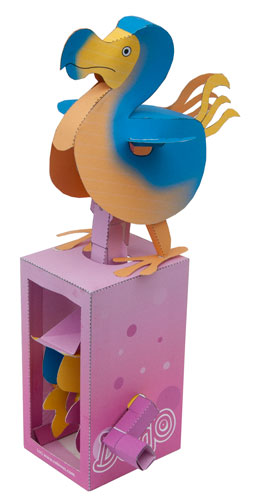
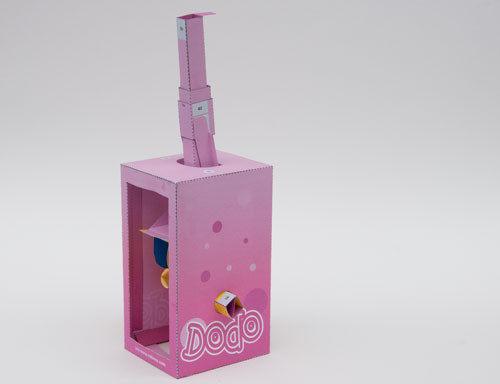
That’s it. Your Dodo model is now complete. Let the glue dry completely then, when you turn the handle the Dodo will once again try unsuccessfully to fly.