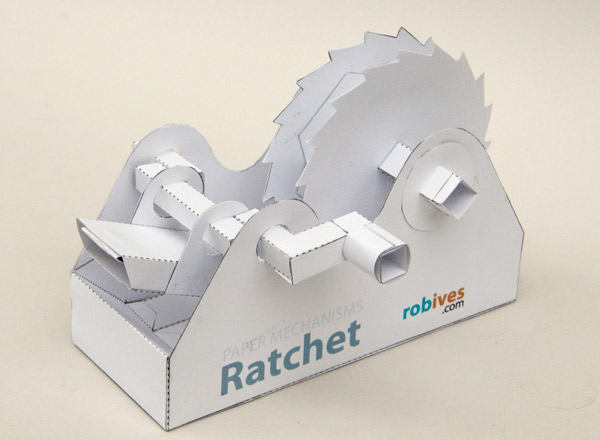
 An updated version of the ratchet model using a second pawl to stop the reverse rotation of the wheel. The animation shows completed ratchet model. Turn the handle and the main wheel advances on tooth at a time.
Which ever way the handle is turned, the wheel always advances in the same direction. If you have already bought and downloaded the original ratchet model you can re-download it as it now has the parts for this version as well.
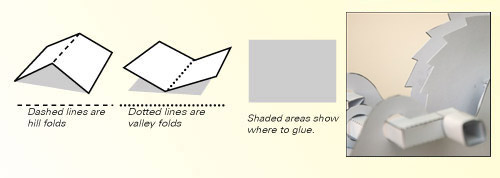
A working paper mechanism for you to download, print out and make. Members can download the parts for free at the end of this post, non-members can download the parts for a modest fee. Print out the parts onto thin card. (230 micron / 230 gsm) Score along the dotted lines and cut out the solid black lines. Don’t cut out the circular holes yet.
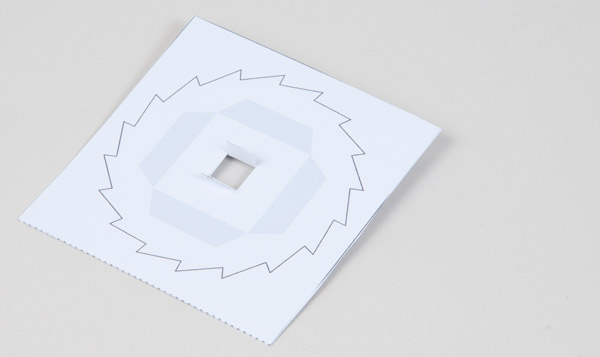
Fold the wheel pieces in half and glue them together to make double thickness card. Make sure that you don’t get glue on the tabs.
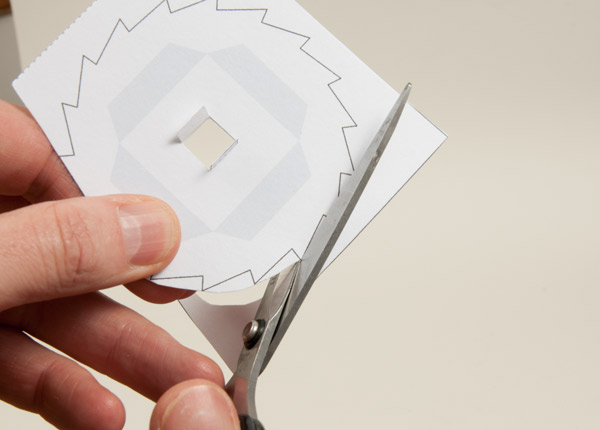
Carefully cut out the wheels.
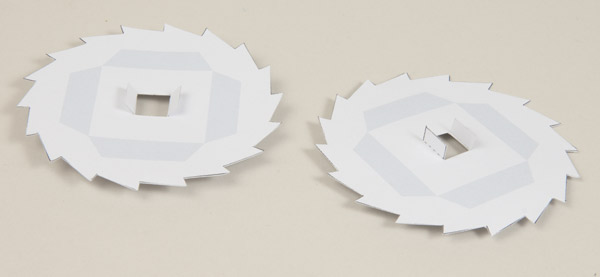
Set them aside for the glue to dry.
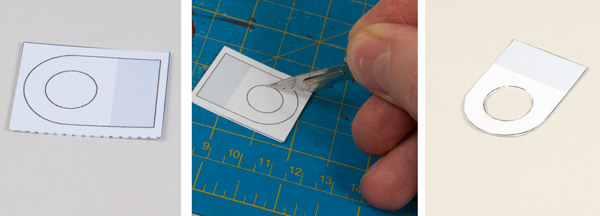
Fold the pawl bearings in half and glue them together to make double thickness card. Let the glue dry completely then cut out the hole with a sharp knife. Complete the piece by cutting round the outside.

Fold up the box inner as shown above left. Glue the two parts back to back to make double thickness of card. Line up the parts as accurately as possible. Set these aside to let the glue dry.
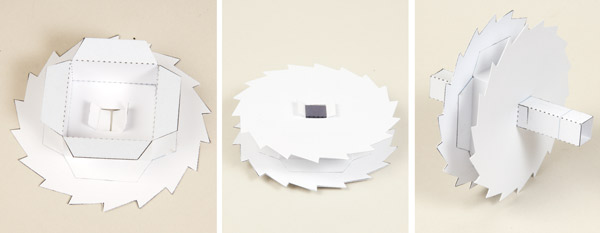
Fold round and glue together the wheel inner.
Glue the wheel inner to one side of the wheel carefully lining up the tabs with the grey areas on the wheel.
Fit the second wheel into place on the other side of the wheel inner rotating it so that the tabs on the wheel centre are running in the same direction.
Fold round and glue together the axle. Thread the axle through the wheel centre and line it up with the grey lines on the axle then glue it into place to complete the wheel.
Fold round and glue together the pawl as shown above. Glue the pawl bearings onto the pawl using the grey areas for alignment.
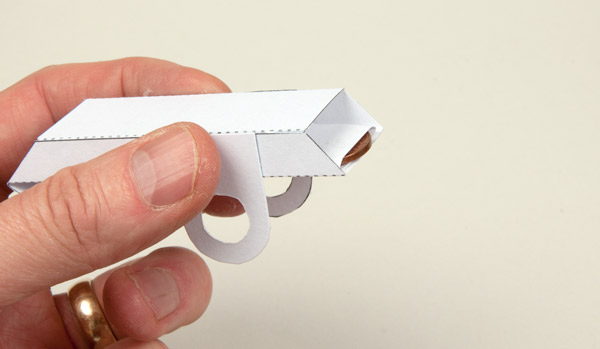
Fold a coin holder round a single 20mm coin (penny) and glue it into place in the end of the pawl as shown.

Assemble the three crank pieces as shown above. The diagonal piece adds strength and rigidity.
Glue one of the short crank pieces to the longer piece using the grey areas for alignment.
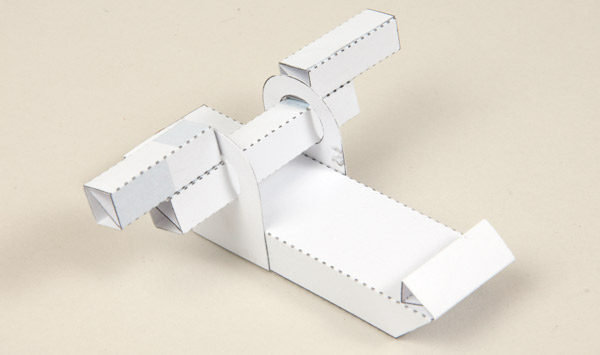
Thread the crank through the bearings and glue the third crank piece into place again using the grey areas for alignment. The crank should be freed to turn in the bearings.

Assemble the handle in three steps. Fold round and glue the two square sections. Fold one section into the other and glue. Roll round and glue down the long tab.
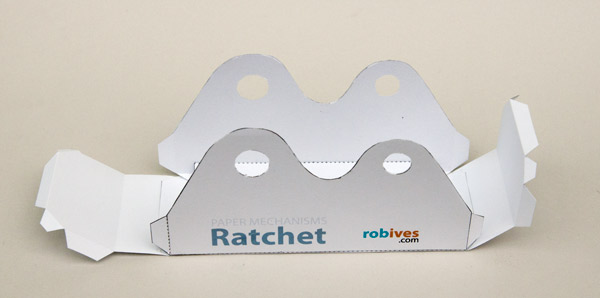
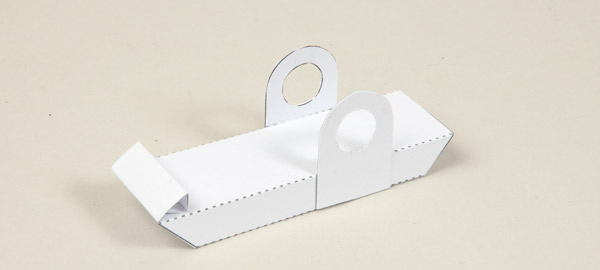
Glue the two box sides onto the base making sure to line up the edges and corners of the parts accurately.
Glue the end onto the tabs at the ends of the base.
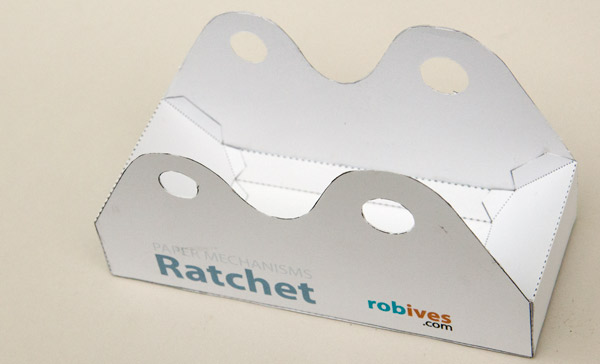
Fold the ends round and glue them down as shown. Notice how much more rigid the box is now!
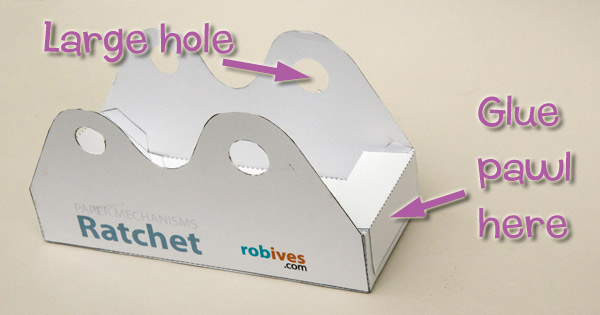
The second pawl stops the wheel rotating backwards. It is simply a fold of card. Glue it into place on the centre of the box end nearest the large hole.
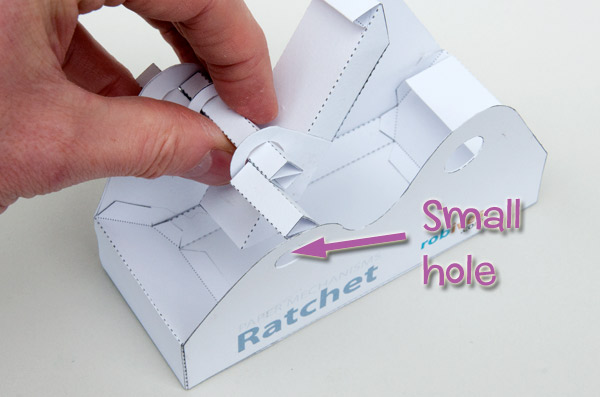
Ease the box sides apart and thread in the crank into the small holes. Notice which way the pawl is pointing.
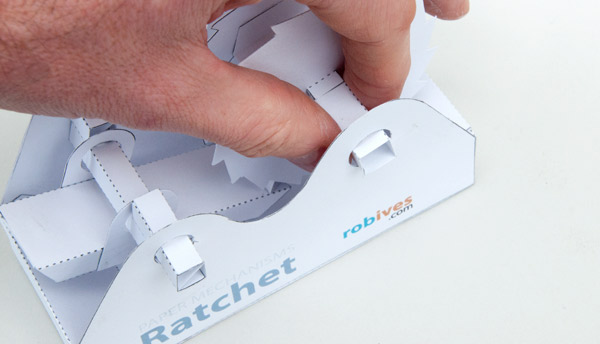
Push the pawl down and thread the main wheel into place in the larger holes. Notice which way the teeth are pointing.
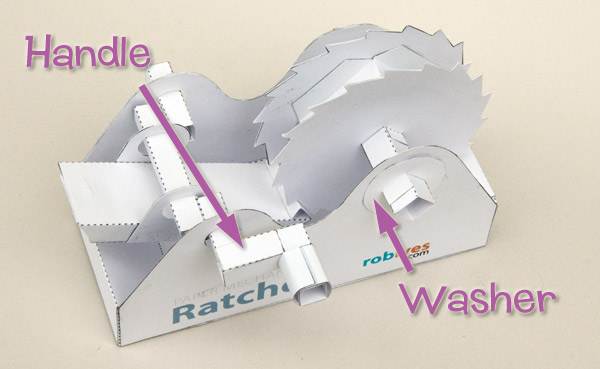
Finish off the model by gluing on the handle and fitting washers lined up with the grey lines on the axle.
That’s it! Once the glue is dry, turn the handle. the main wheel will advance one tooth at a time always in the same direction no matter which way the handle is turned. Use this model to find out about mechanism and how they work or as a starting point for your own models.