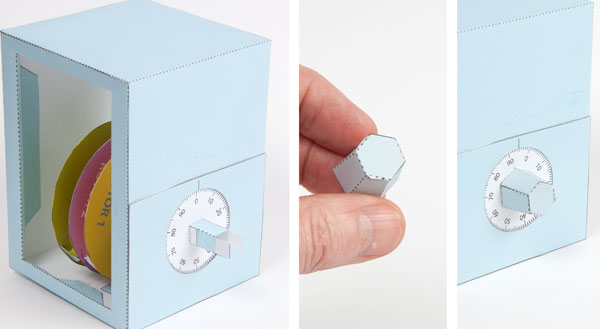
A fully working paper safe to download and make. Dial in your secret combination at the dial on the front of the safe to unlock the hidden drawer.
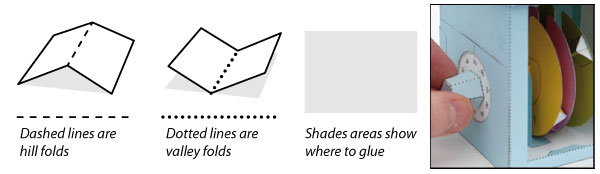
Print out the parts onto thin card. (230 gsm / 230 micron) and let the ink dry completely. Carefully score along all the dotted and dashed lines then cut out the holes with a sharp knife before carefully cutting out the parts. Accuracy is very important in this model to make sure that the locking sleeve moves up and down easily. Take care!
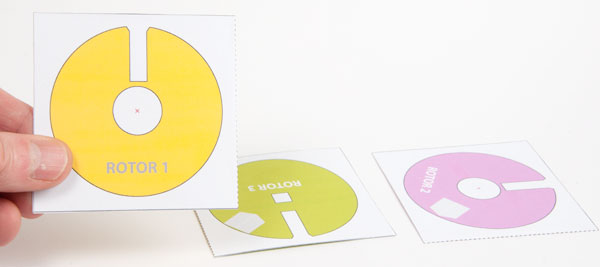
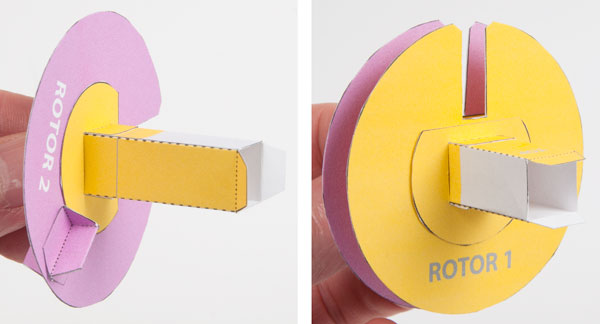
Fold over and glue down the three rotors so that they are double thickness card. Let them dry under a heavy book so that they stay flat.
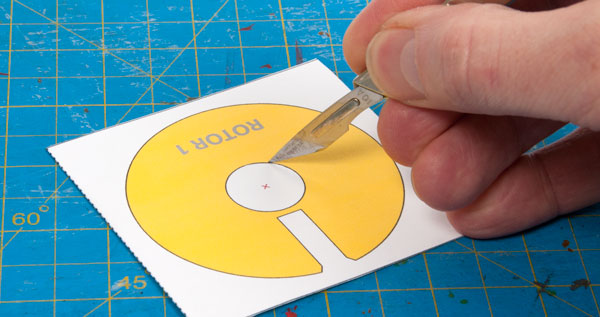
Carefully cut out the centre hole then cut out the rotor.

Smooth the edges of the centre holes with a round pencil to make sure that there are no points that will catch as the rotors turn.
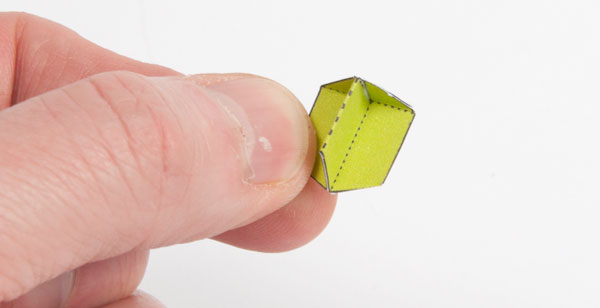
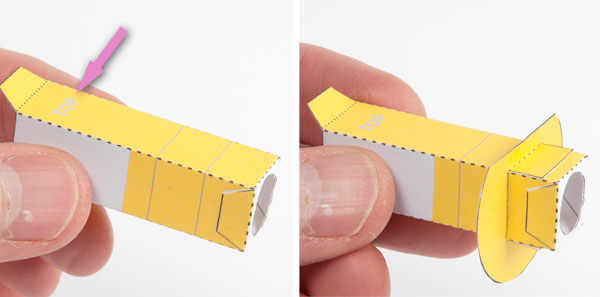
Fold up and glue together the four blocks.
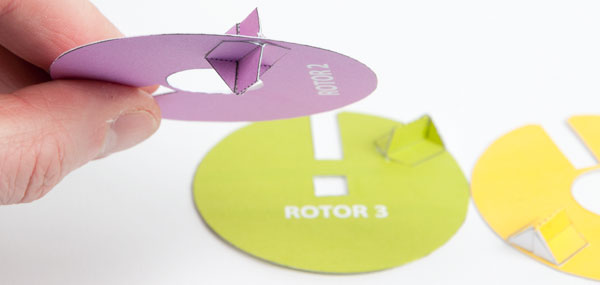
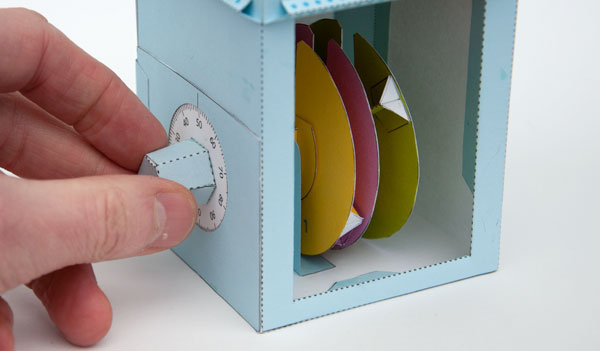
Glue the blocks to the rotors in the positions shown. The block positions control the final combination of the lock so you might like to experiment with different block positions.
Assemble the axle tube and locate the top. Fit the first washer into place with the flat side at the top lining it up with the first grey line.
Slide rotor 2 into position with the writing forward as shown. Push the second washer up to the rotor and glue the tabs to the box – not the rotor! The rotor should be free to rotate. Make sure that the flat part of the washer is lined up with the previous washer. Glue the third washer to the shaft lining it up with the second grey line then fit rotor 1 in the same way as the previous one. It too must be free to rotate.
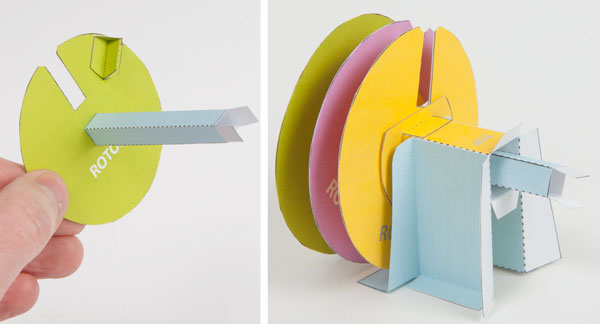
Fit the axle to rotor 3 as shown. Thread the rotor into place through the circular hole and out through the square hole. Carefully glue the two axle supports into place making sure that the side are lined up accurately.
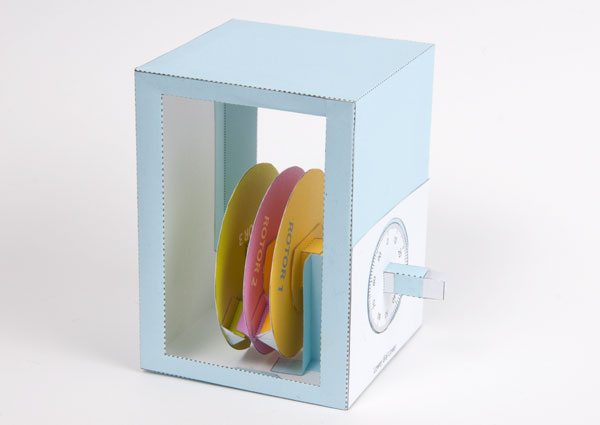
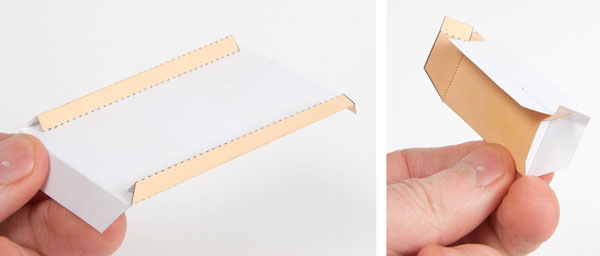
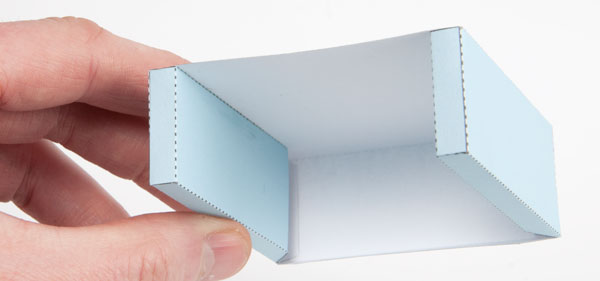
Glue together the two parts of the box as seen above.
Fit the rotor pack into the box through the circular hole in the front of the box.
Glue the dial to the shaft so that the shaft is still free to rotate.
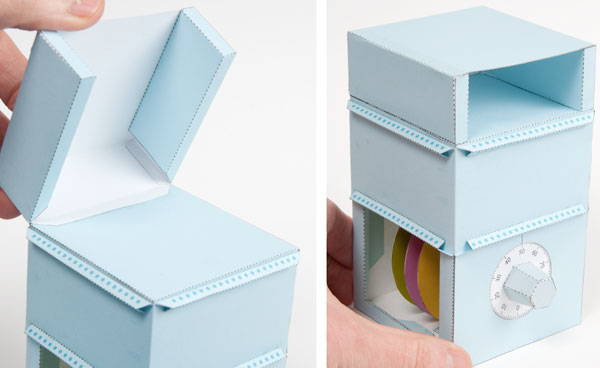
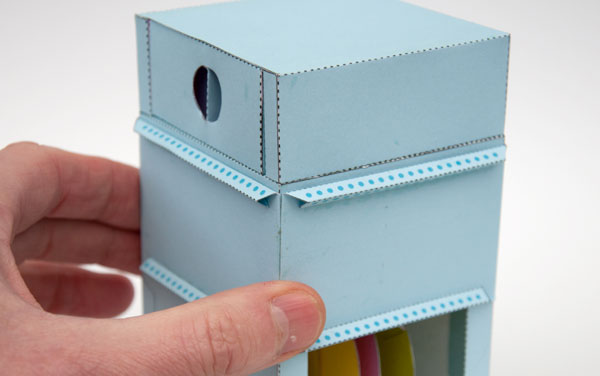
Glue the lower box cover to the box front round the dial.
Glue the upper box cover so that it holds the dial into place but the dial is still free to rotate.
Assemble the knob and glue it to the axle and the dial.

Assemble the two parts of the sleeve.
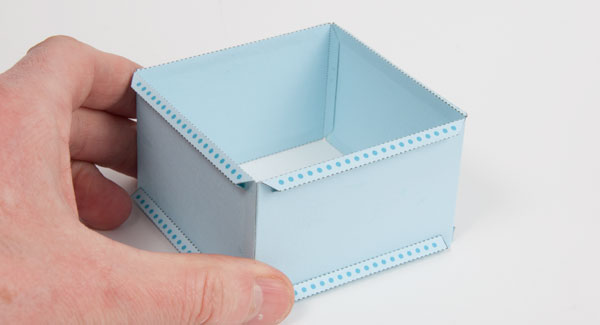
and glue them together.
Glue together the blade support and the blade.
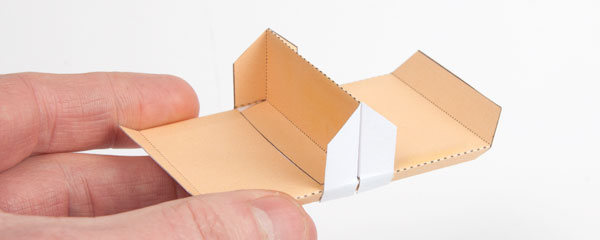
Glue the blade to the blade support.
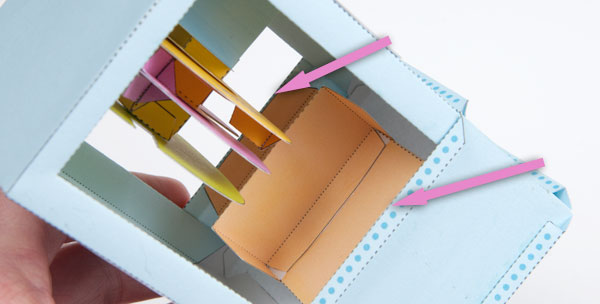
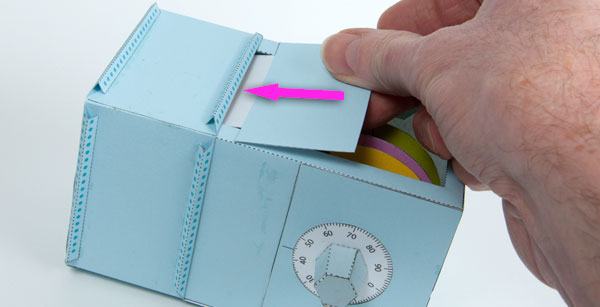
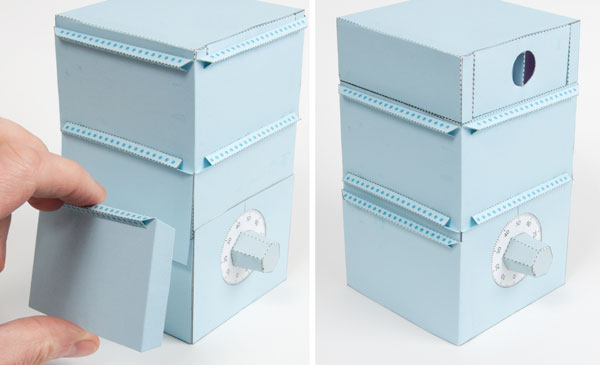
Slide the sleeve over the top of the box and push it down a little. Glue the blade support to the inside of the sleeve, lining the two flaps up with the two edges arrowed.

The result should look like this. With the rotor slots aligned vertically the sleeve should slide down and the blade will fit into the slot.
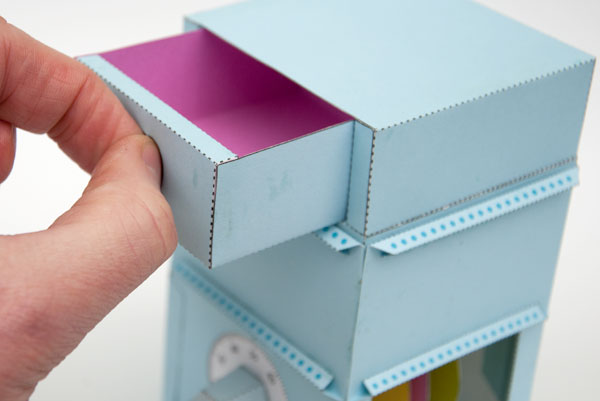
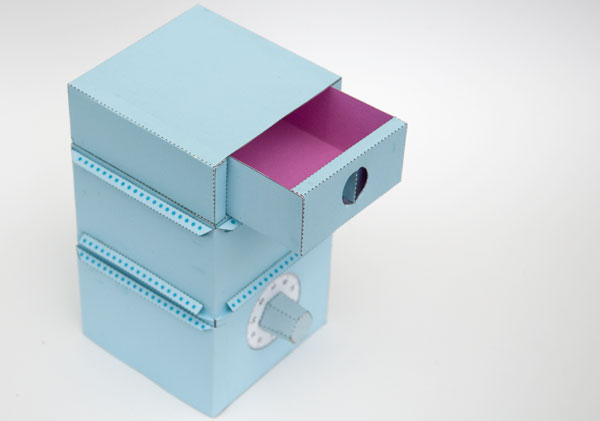
Glue together the drawer cover.
Glue the drawer cover to the box top. Make sure that the drawer cover and the box are accurately aligned with each other so that the sleeve can slide up over both.
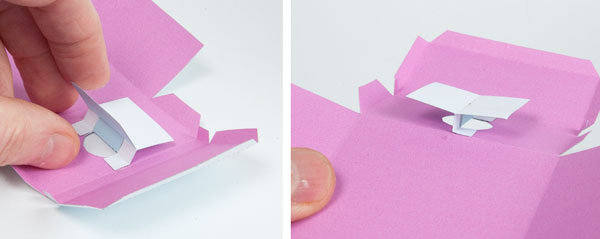
Glue together the drawer handle and glue it so that it sits across the middle line of the circular hole in the drawer.
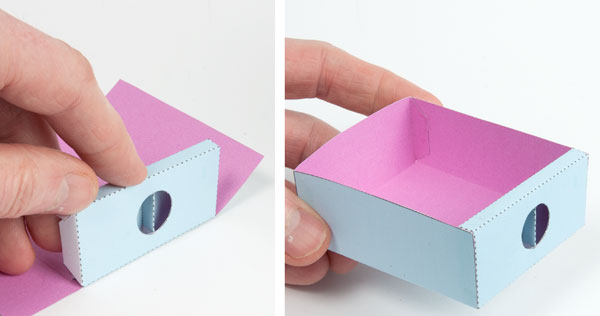
Fold up and glue the drawer front, then complete the drawer assembly.
Slide the drawer into the drawer cover. Lift up the sleeve, Spin the dial. Your safe is now locked.
Before you do anything else you need to write down the combination. Here’s how you work it out.
Look at the rotors from the side of the box. To be unlocked you need the slots to be all vertical and lined up with the blade. Differences in construction mean that the safes will have different numbers.
Turn the dial clockwise two full turns, this should gather up all three rotors and by now they should all turn together. Continue turning until the slot in the front rotor, rotor 1 is vertical and note down the dial number.
Turn the dial back anti-clockwise at least one full turn until rotor two is gathered up the keep turning until the second rotor slot is vertical. Note down this number.
Finally turn clockwise again until rotor three, the one directly connected to the shaft, is vertical and note down this final number. These three numbers are your finally combination.
Try the lock out a couple of times to make sure that it works properly before continuing to the next optional step.
If you’d prefer the mechanism covered up you can follow these final step.
Slip the piece with the two cut-outs into place under the sleeve and glue it to the sleeve.
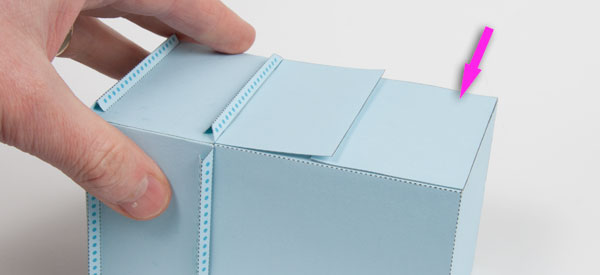
Fit the rectangular piece to the lower part of the box.
And to cover up the parts, assemble the cover and glue the two vertical tabs to the front and back of the box allowing the first piece to slide up and down.
Done!
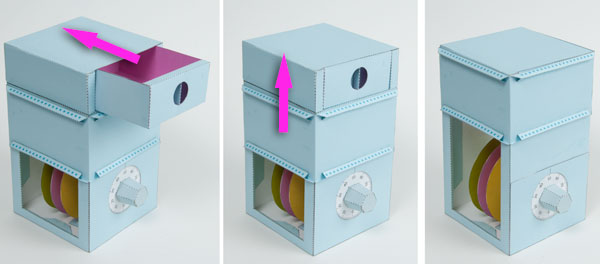
Dial in the number…
Slide down the sleeve…
Open the box!