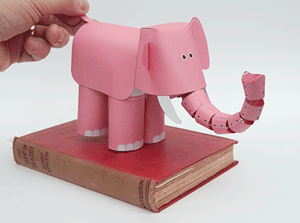
 Download and make the fabulous Flex-Trunk Elephant! Print out the parts pages on your own printer and follow the instructions below to make the model. Pull the tail and the trunk lifts up. Fun!
The Flex-Trunk elephant should be printed onto three sheets of thin card (230 micron/67lb.) Note that the final sheet is printed on both side. Print out the front, flip the card over and return it to the printer before printing the back. Once the ink is completely dry, score along all the dotted and dashed lines before carefully cutting out all the parts.

Roll up and glue all four legs. Notice that the toes are matched pairs. Glue together each pair of legs making sure that they are lined up accurately.
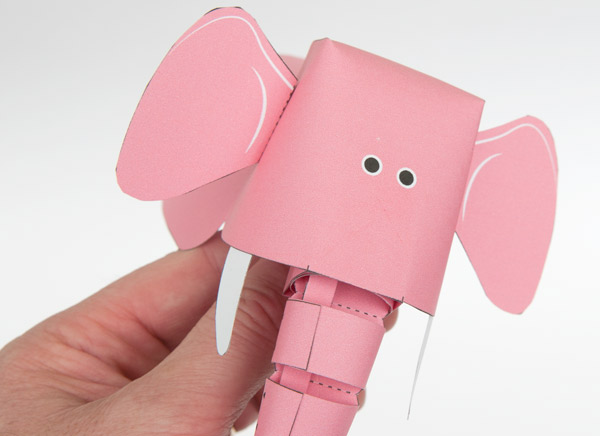
Glue the trunk holder to the back of the head so that it is between the two small black lines.

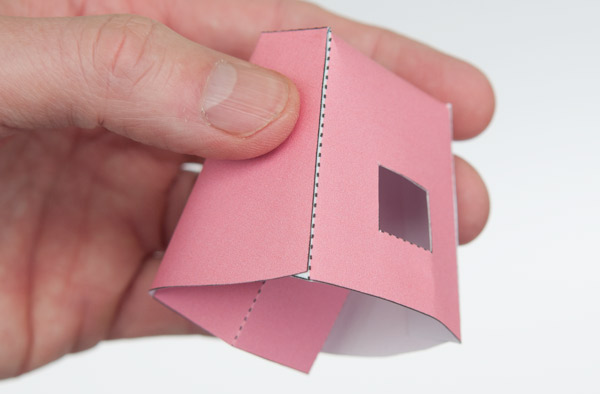
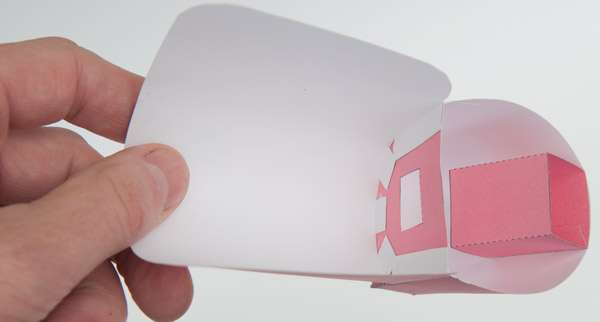
Roll over the flap in the hole in the back of the head and glue it down.
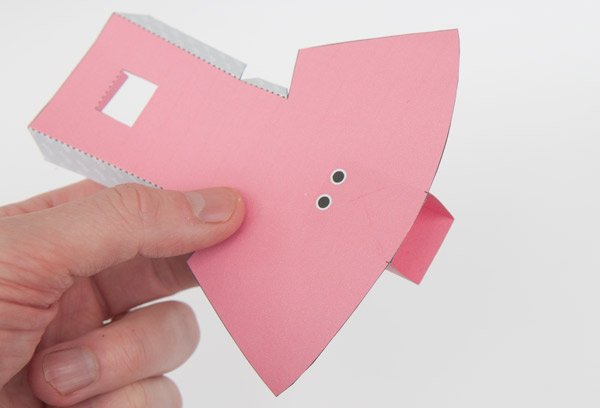
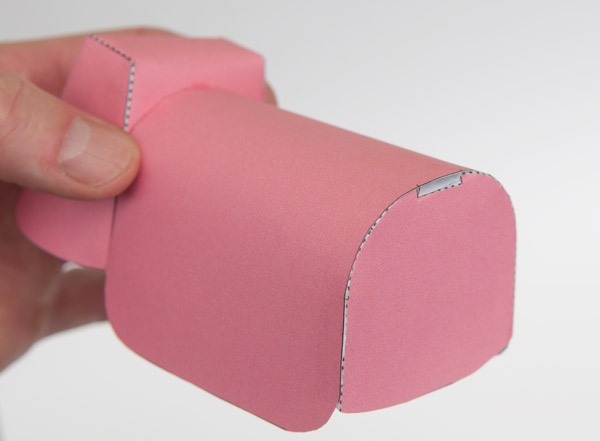
Glue together the head as shown.
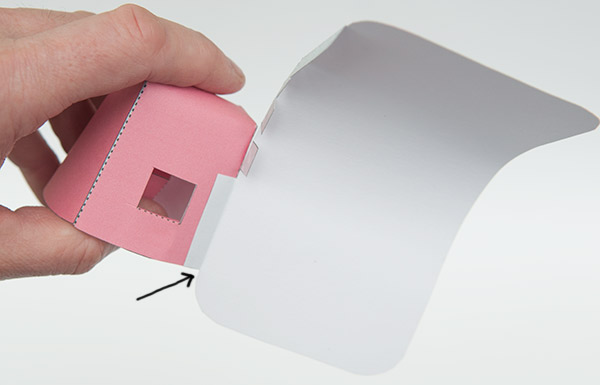
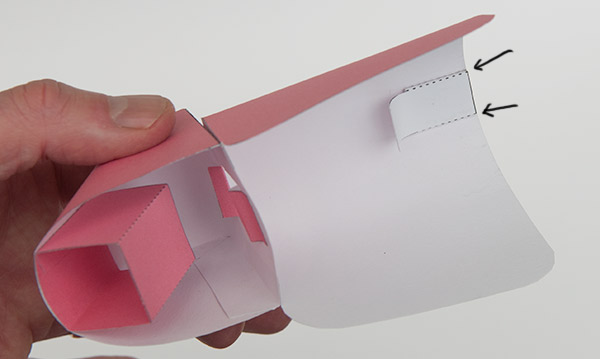
Glue one of the long body tabs to the back of the head so that it lines up with the edge and bottom of the head as shown.
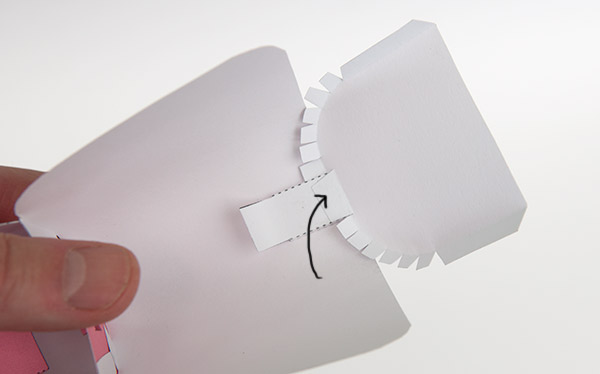
Roll round the body and glue down the remaining body tabs.
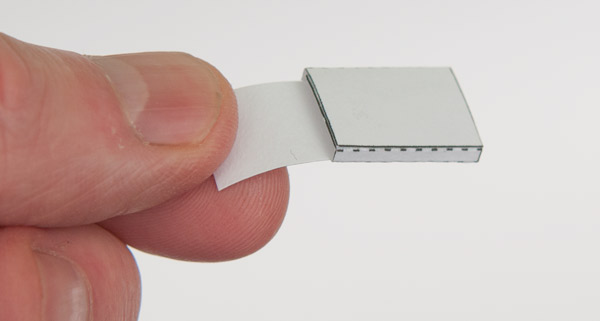
Fold up and glue together the tail slide.
Glue the tail slide to the inside back of the body. line it up between the two small black dots on the outside of the body.
Glue the centre tab of the back to the end of the tail slide.
Fit the back of the elephant into place.
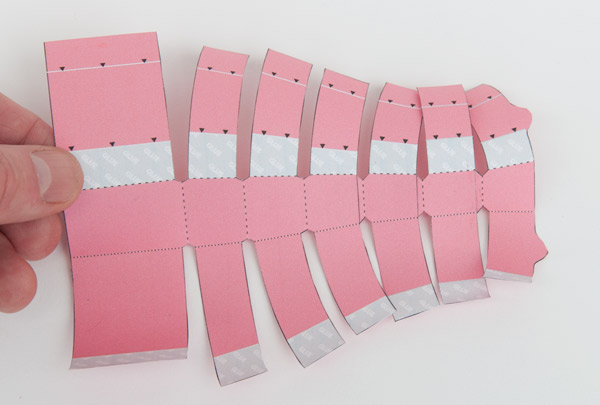
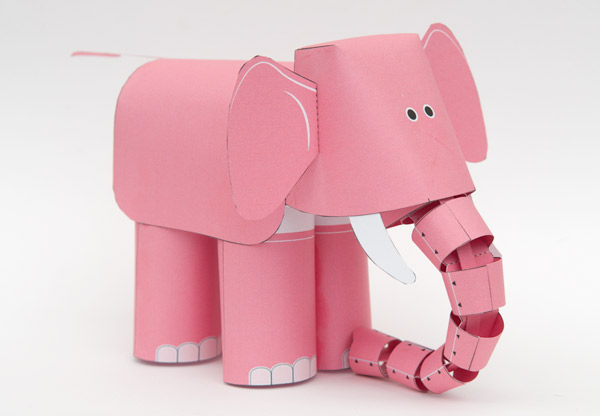
Glue together the four sections of the trunk as shown. Make sure that they are in the same order as they appear on the page.
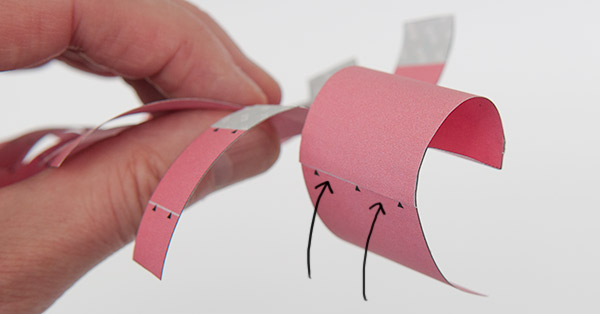
Starting at one end of the trunk, roll round and make each trunk section. Starting with the tab with the grey end, roll it round and glue it down to the grey area on the opposite side lining it up with the small black arrow heads.
Roll the other side round and glue it down lining the grey line with the diagonal centre piece as shown.
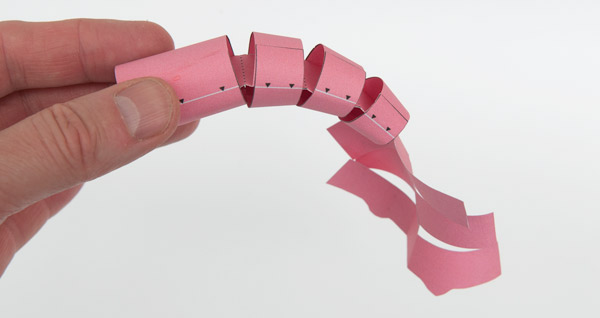
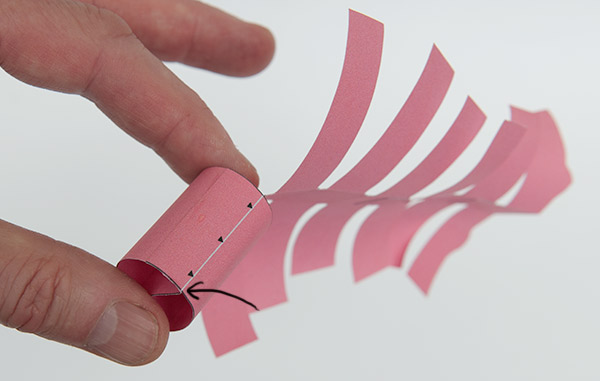
Work your way down the trunk, gluing each section in the same way…
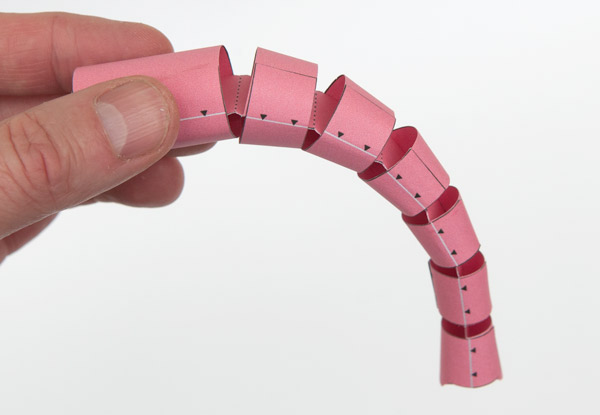
…until the trunk is complete.
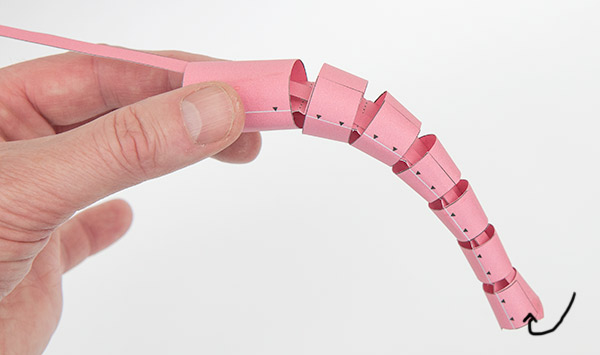
Glue together the three sections of tendon/tail with the shortest section in the middle. Thread the square end right the way through one side of the trunk and glue it to the inside surface of the very last section of the trunk.
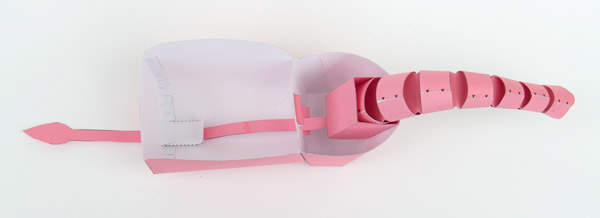
Thread the tail all the way through the trunk holder, the hole in the back of the head and out through the tail slide.
Glue on the ears and tusks as shown.
Complete the model by gluing the legs into the body.
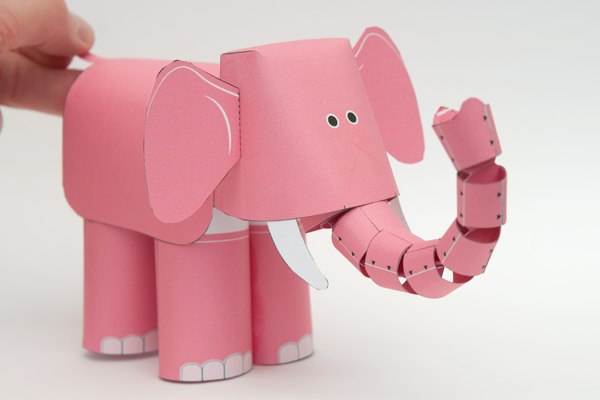
Pull the tail to raise the trunk!