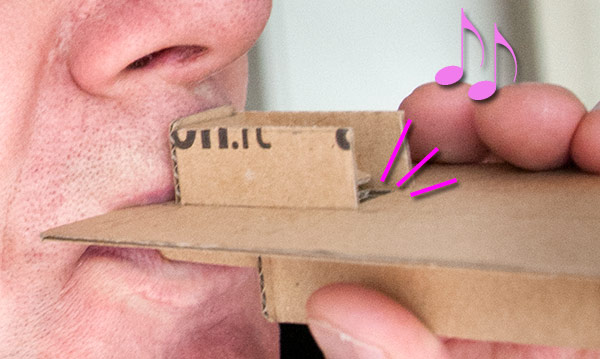
As fans of real paper books we have a stack of old Amazon packaging waiting to be recycled.Happily it turns out that corrugated card can be used to make a very clear sounding whistle. The downside is that corrugated card doesn’t fit into your average desktop printer so the pattern has to be transferred from standard paper to the card manually.
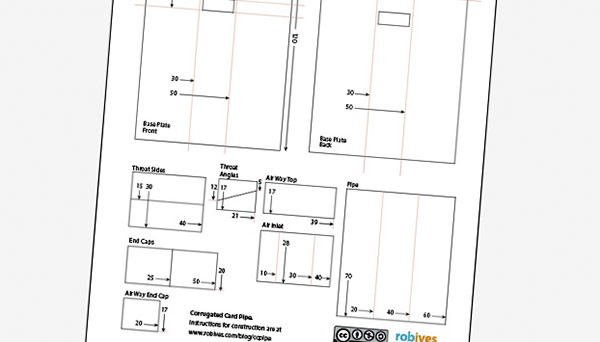
Members can download the parts sheet at the usual place. The sheet shows the dimensions of the parts that you’ll need to make a working, single note, whistle. The parts are all lined up so that the corrugations run vertically up and down the page.
Marking out the pieces
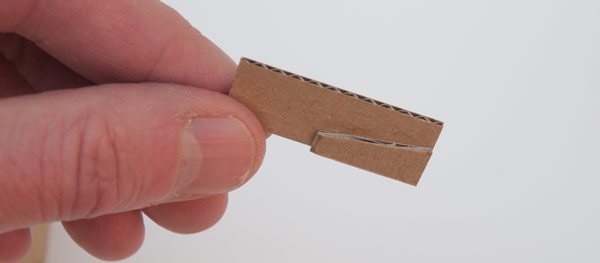
This section shows how to mark out the pieces ready to cut. I’m making the Pipe Body piece as an example.
Start with a piece of card cut into a large rectangle. The card used was 1.5mm thick.
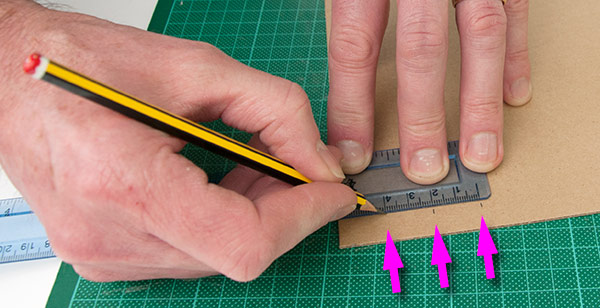
Mark out the three dots arrowed above at 20mm, 40mm and 60mm
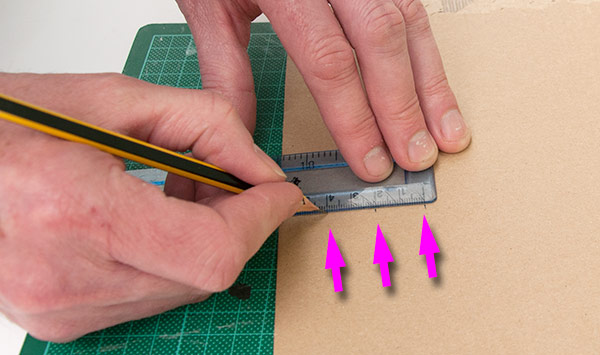
Repeat the process further down the card, again marking out the dots.
Join up the three pairs of dots with ruler and pencil. Using pairs of dots rather than a single dot ensures that the line you draw is parallel to the edge of the card.
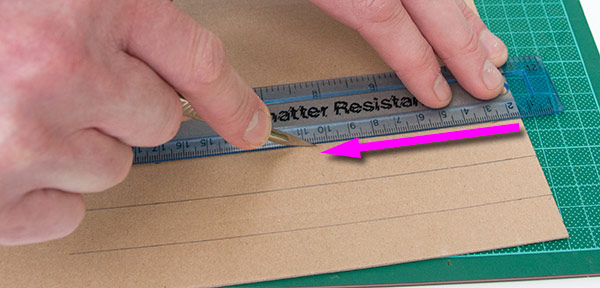
Cut along the third line with a sharp knife. The cut needs to be roughly 100mm long.
Mark out two dots both 70mm from the end of the card. The further apart these dots are the more accurate your cut will be.
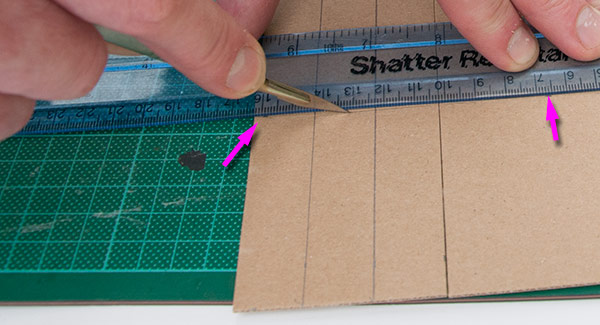
Line up your ruler with the two dot and cut out the piece.
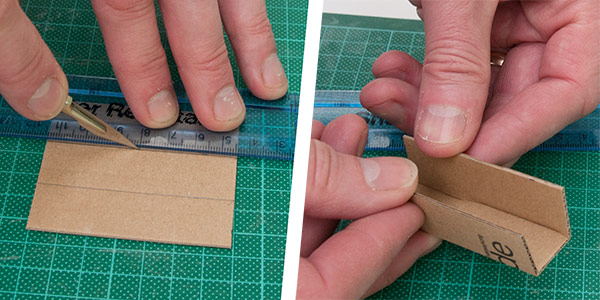
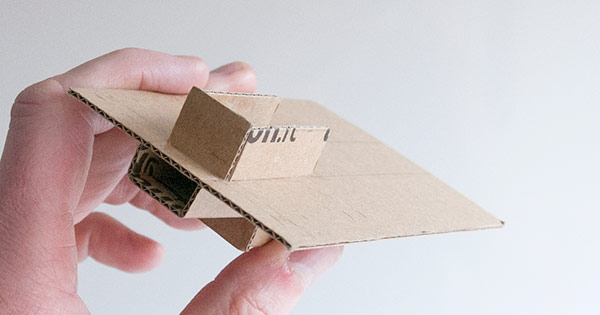
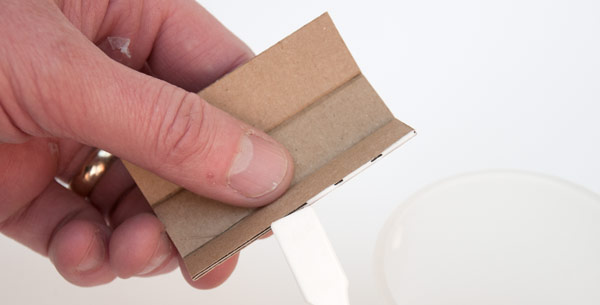
Score along the two pencil lines with your knife by cutting through the top layer of card only. Fold up the piece with the score lines on the inside of the fold.
Other parts are made in the same way. Be as accurate with your measuring and cutting as possible.
Assembling the Parts.
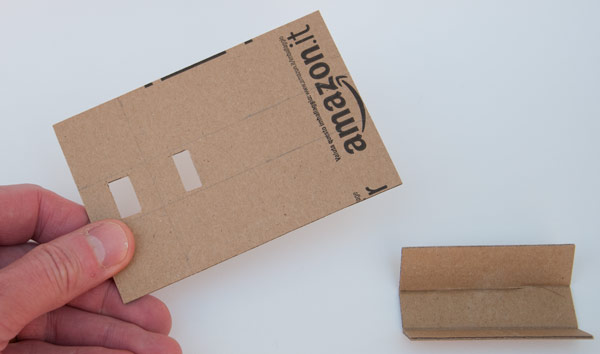
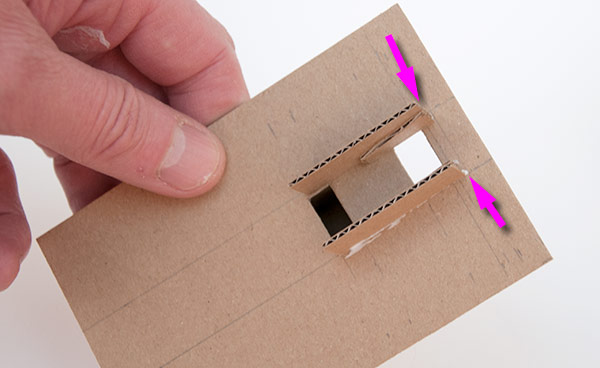
Cut out the base and cut out the two holes. Notice that the base has construction lines on both sides, be sure to mark them up correctly and accurately.
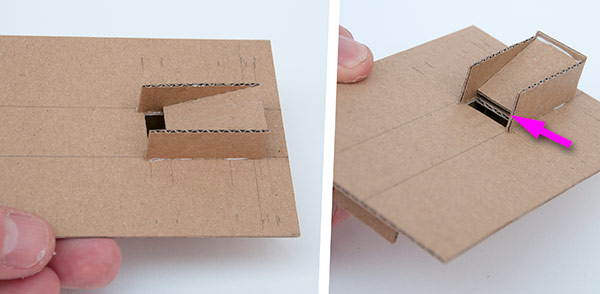
Apply a little PVA glue to the two long edges of the pipe body.
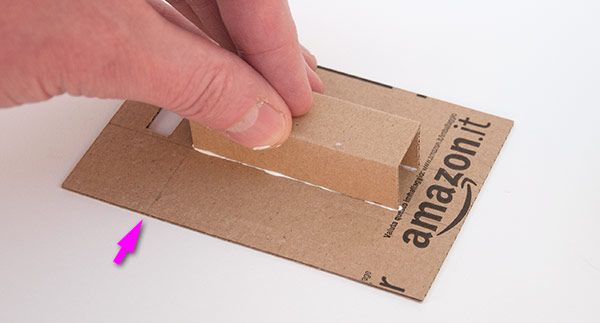
Glue the pipe body to the back of the base lining it up with the two long lines. Line up the end of the pipe body with the arrowed line.
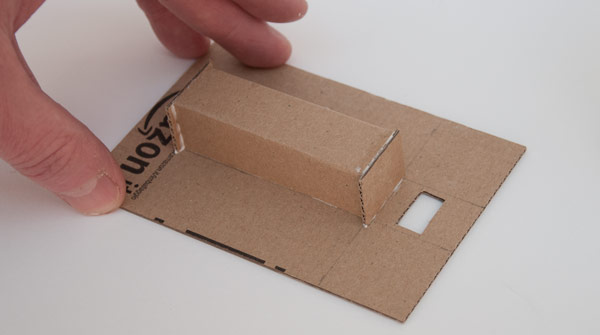
Glue the two end caps into place. Make sure that all the joints are air tight.

Flip the base over.
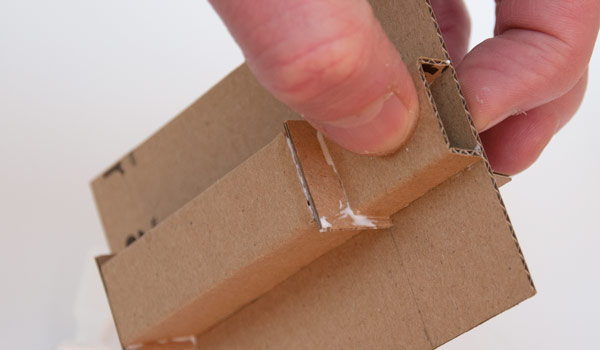
Make up the two throat sides by gluing a throat angle to the bottom right of one (above) and the bottom left of the other so that it is a mirror image of the one above.
Glue the two throat sides into place so that they are within the two long lines and are lined up with the 7mm line.
Glue the airway top into place so that the gap, arrowed above, is approx 1mm high.
Glue the airway cap to the back of the throat sides to seal the airway. Only the slot at the front should now be open.
Glue the air inlet into place to complete the project. Once the glue is dry blow through the hole to make the Whistle work.
Bellows next.