

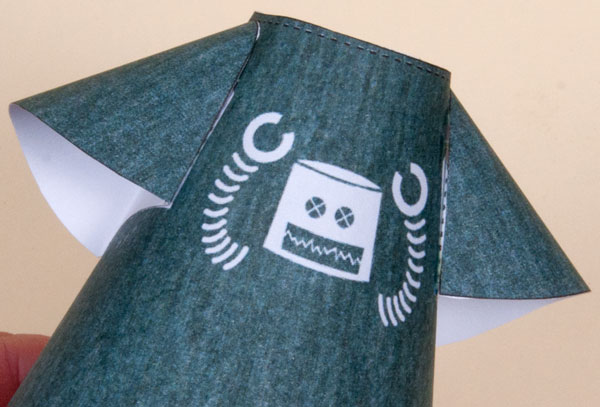
The logo on the T-shirt in Surly Jack was designed in Illustrator then imported onto the T-shirt texture in Photoshop, more of which later. Here is a walk through of how I created the robot logo.

The logo is white, this makes it tricky to see so the first step is to create a grey rectangle in its own layer to act as a background. Lock the layer by clicking where the padlock shows in the image above. Click on the new layer to start the logo proper.
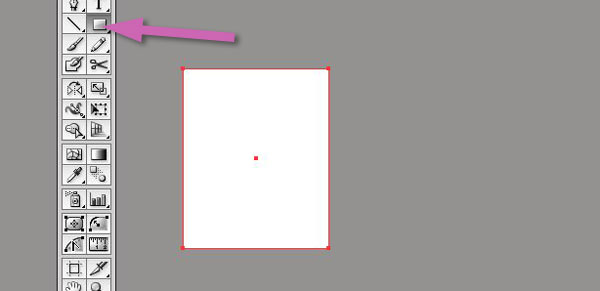
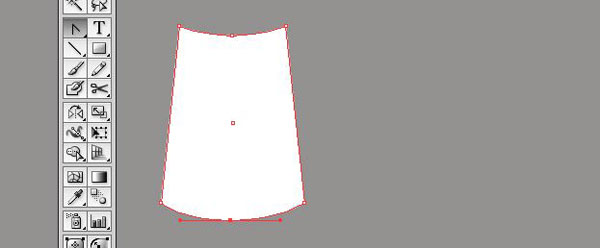
Using the rectangle tool to create a white rectangle with no outline stroke.
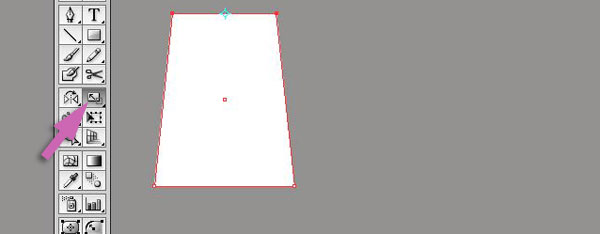
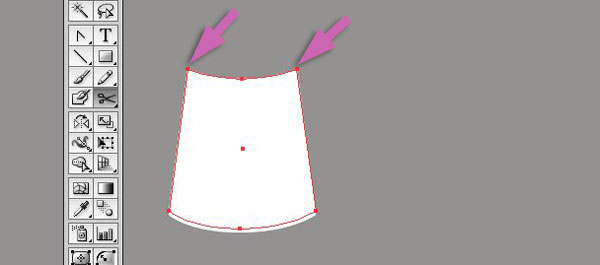
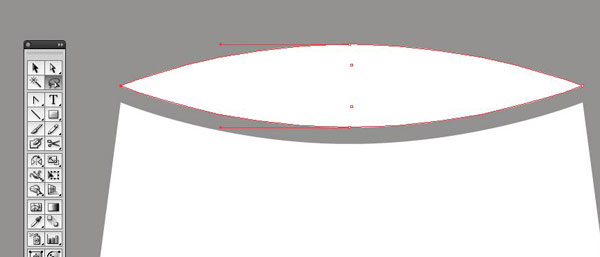
Select the to top points of the rectangle using the direct selection tool (the white arrow) the taper the box using the scale tool (arrowed)
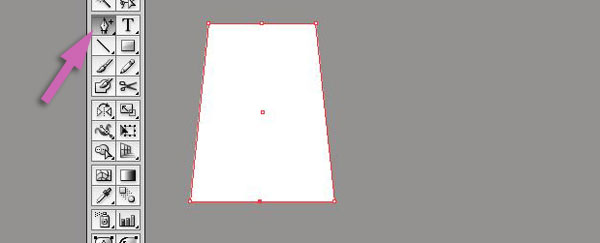
Choose the Add anchor points tool and add a new anchor point top and bottom of the box.
Use the Direct selection tool to move both these new points down then use the Convert anchor point tool to change the top and bottom lines into curves.
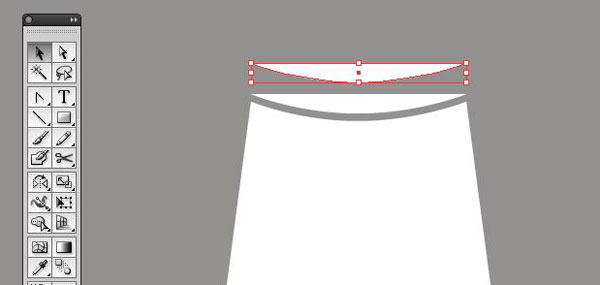
<alt><Up arrow> to create a copy of the shape slightly higher on the page than the original.
With the scissors tool, cut the new shape at the points indicated and delete the lower half of the shape leaving only the top curve.
<shift><alt> Drag the top curve to make a copy
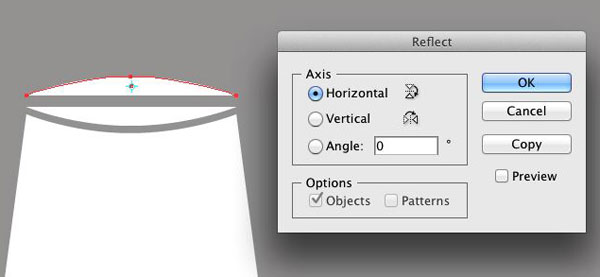
With the reflect tool, flip the top copy about the horizontal axis.
Use the arrow keys to move both parts together then lasso both ends and join them together using
Path -> Join
Select the head top and resize it down slightly.
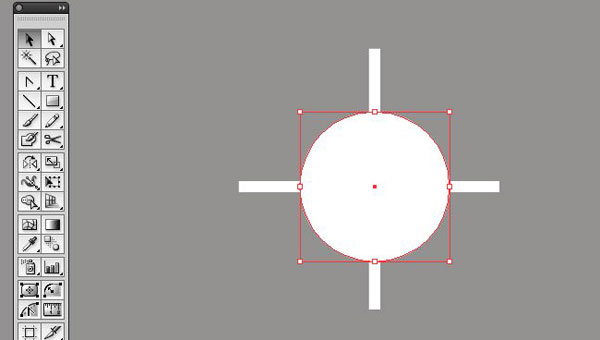
Eyes: Create a circle and two rectangles as shown above. Line up the rectangles so that they pass through the centre of the circle.
Select the circle only and bring it to the front using Object -> Arrange -> Bring to Front
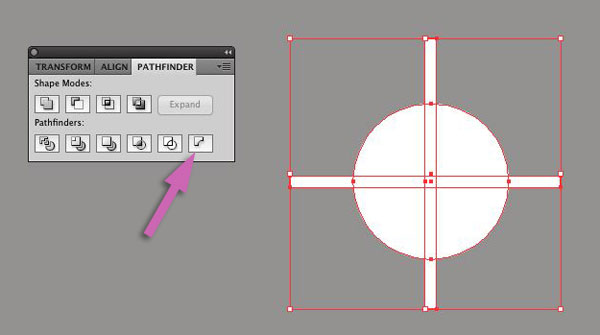
Bring up the Pathfinder tool panel. Windows -> Pathfinder
Select all three objects then click on the Minus Back button to subtract the two rectangles from the circle.

Rotate the eye by 45 degrees then <shift><alt>drag it to copy it.
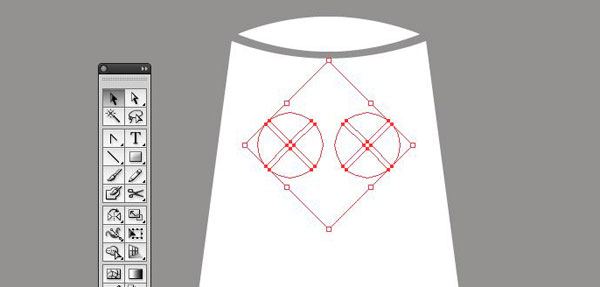
Position the eyes on the head, resizing if necessary.
Move the eyes to the back using Object -> Arrange -> Move to Back

Select the head and eyes then click on the Minus Back button to cut out the eye holes.
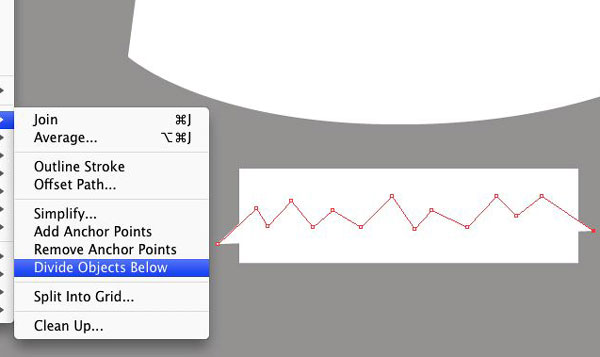
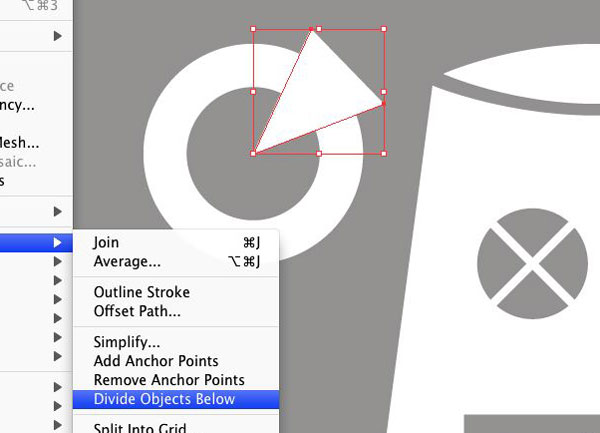
Mouth: Create a rectangle like the one in the picture above then use the pen tool to create a zig-zag line across the mouth.
With the zig-zag selected split the mouth in two using Object -> Path -> Divide Objects Below
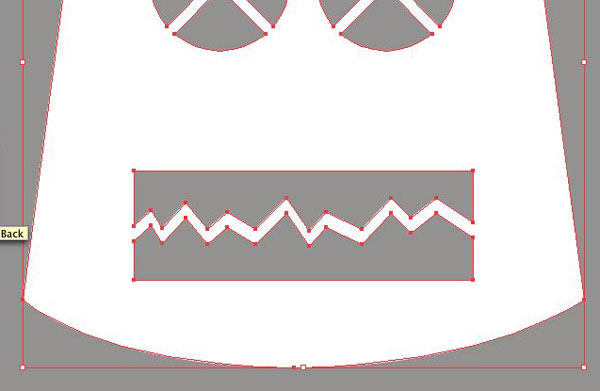
Separate the two parts of the mouth slightly

Drag the mouth into place on the head and move it to the back. Object -> Arrange -> Move to Back
Cut the mouth out using the Pathfinder tool
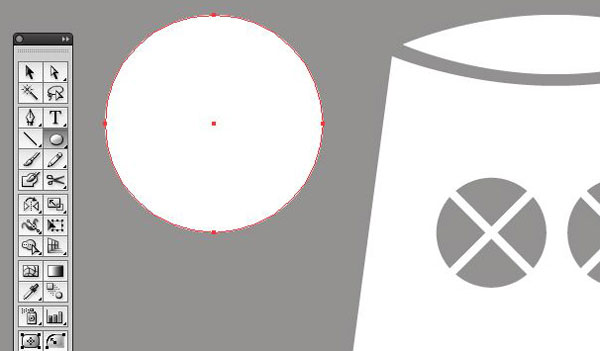
Claws: Create a circle as shown above.
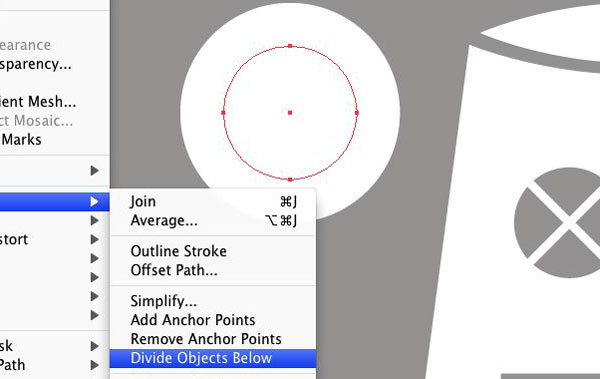
Create a second smaller circle centred above the first and use the Divide Objects Below tool to cut out the smaller hole. Select and delete the smaller circle.
Use the pen tool to create a triangle and again divide the shape to complete the claw shape.
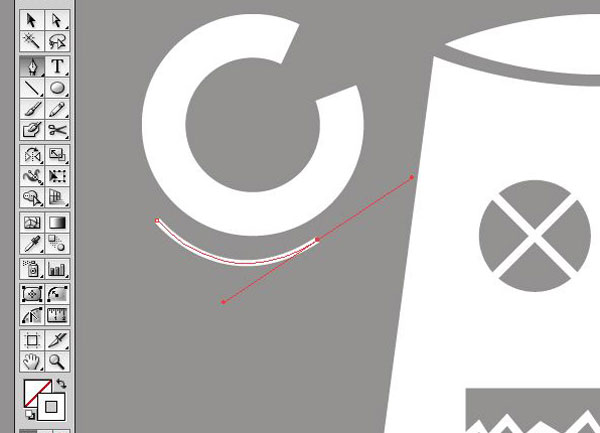
Arm: Use the pen tool to create a short arc as above.
<Shift><Alt> drag to copy the arc.
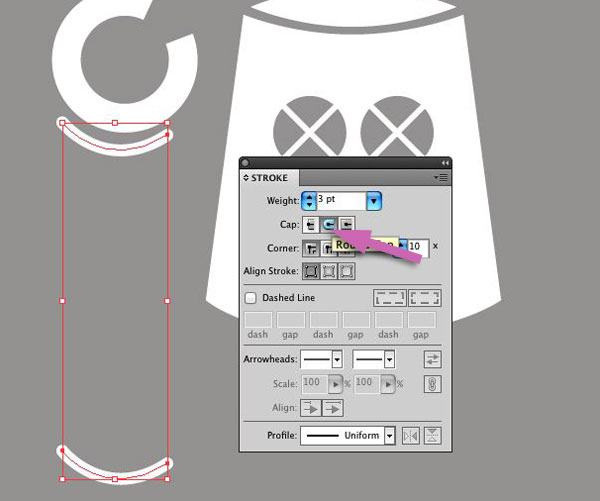
Open the Stroke palette set the line weight to 3pt and click on the round end cap button.
Windows -> Stroke
To create the arms we'll use the Blend tool.
As the name suggests, the Illustrator blend tool allows you to blend from one shape to another or, as in this case, to make a string of copies of the same shape.
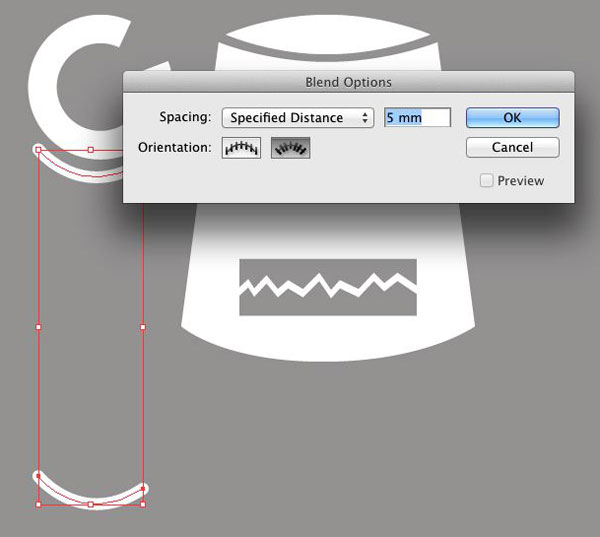
Open the Blend Options window. Object -> Blend Options and set the options as above. In the end I used a 3mm spacing, you can change this value at any point to try out different effects.
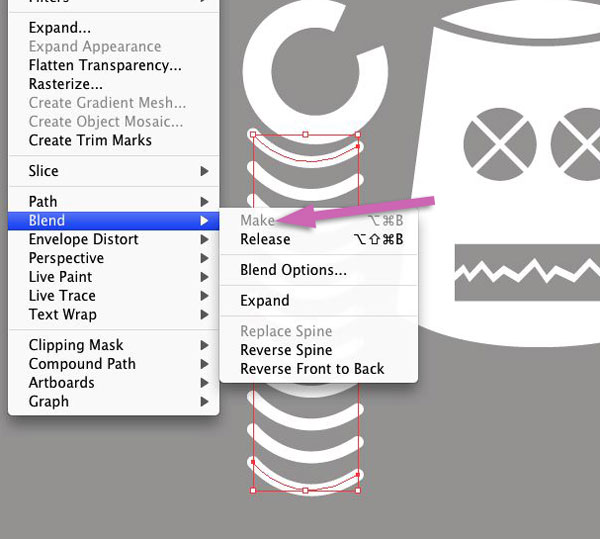
Select the top and bottom arc. Make a blend between them. Object -> Blend -> Make
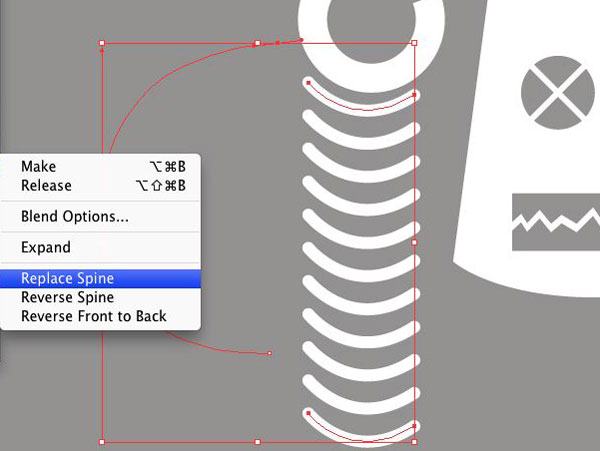
Now to make the arm curved. The line that the blend follows is called the Spine. We are going to replace the straight spine with a curved one. Set the stroke and fill to none and select the pen tool.
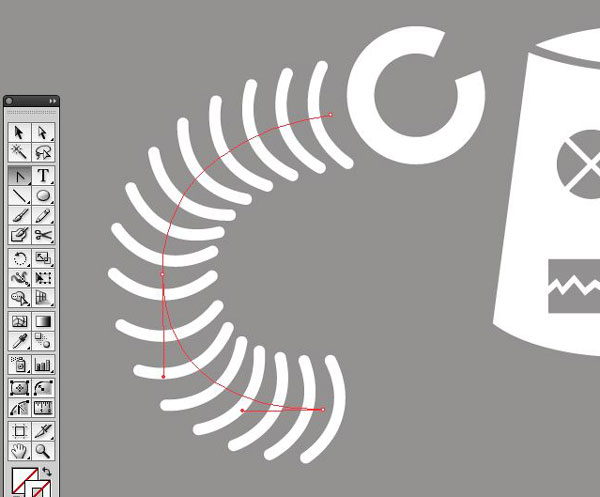
Start at the bottom and make a semi circlular curved line with three anchor points, one at each end and one in the middle. (The red line above left)
Select the blend and the new spine then click on Object -> Blend -> Replace Spine.
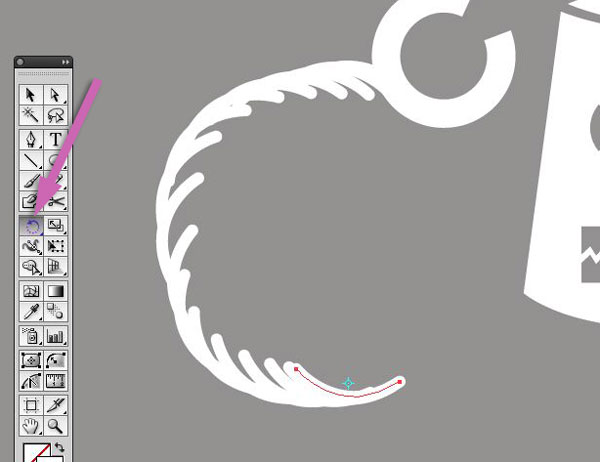
The initial results don't look promising but hang-in there.
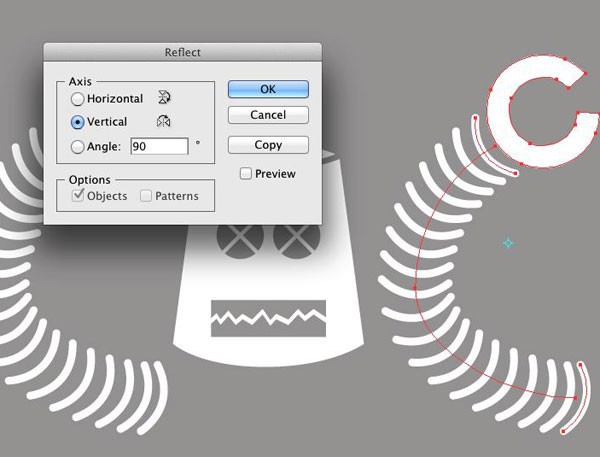
Using the direct selection tool select both ends of the lower arc then select the rotate tool.
Rotate the lower arc as shown. You'll see that the other arcs re-arrange themselves.

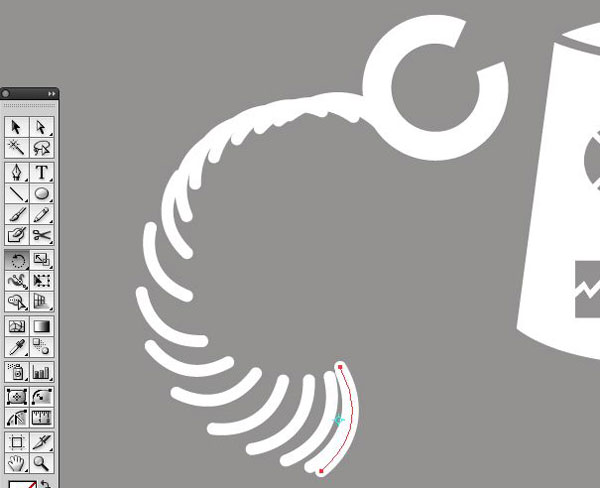
Repeat the process with the top arc. Looking better already. Just the spine to tidy up now.
Using the direct selection tool and the convert anchor point tool edit the spine until the arcs are evenly spaced along the line length.
Select the arm and claw and make a copy. Flip it using the reflect tool.

All done! The result is a vector image so you can easily scale and move the image elements to get just the balance that you are looking for.
I hope that was useful. Don't forget to leave a rating / comment below.
