
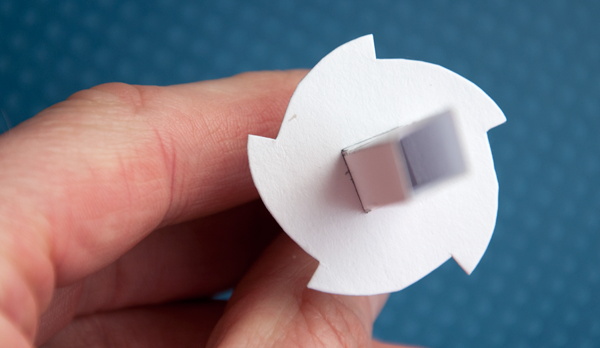
I've been experimenting with ratchet design for an up coming project. The previous ratchet I had made had eighteen teeth. I had constructed the main wheel using straight lines, this time I was aiming to create a wheel with between three and five teeth. As will become apparent, the straight line construction technique is no longer suitable. Here's how I created a five tooth ratchet gear in Adobe Illustrator.
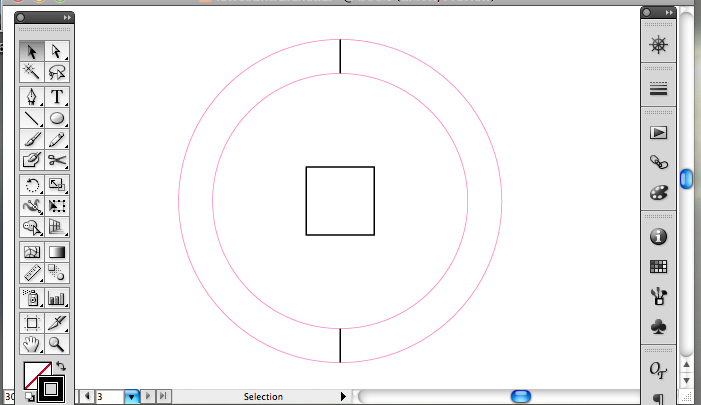
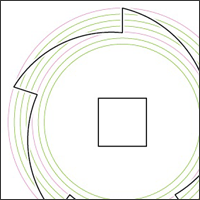
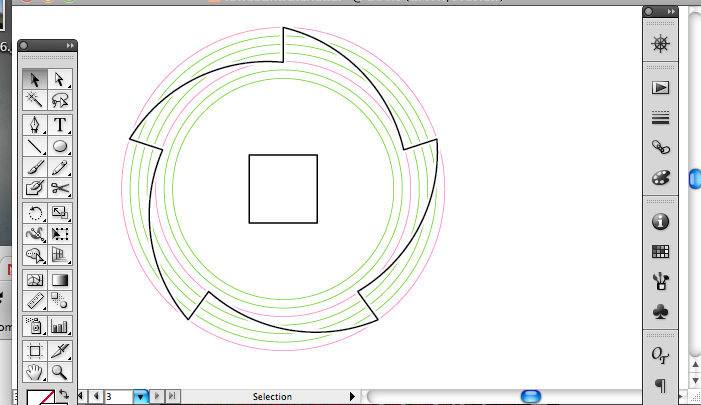
The centre square is 8mm across, the inner circle 30mm and the outer circle 38mm making the two black lines top and bottom 4mm long each.
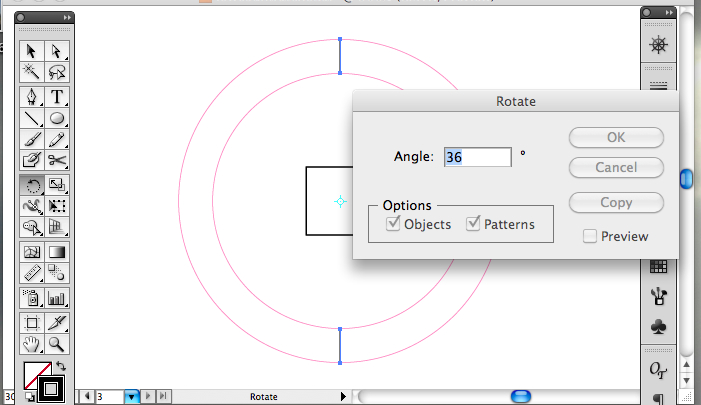
Select the two vertical lines, select the rotate tool, enter 36 degrees and click 'Copy'.
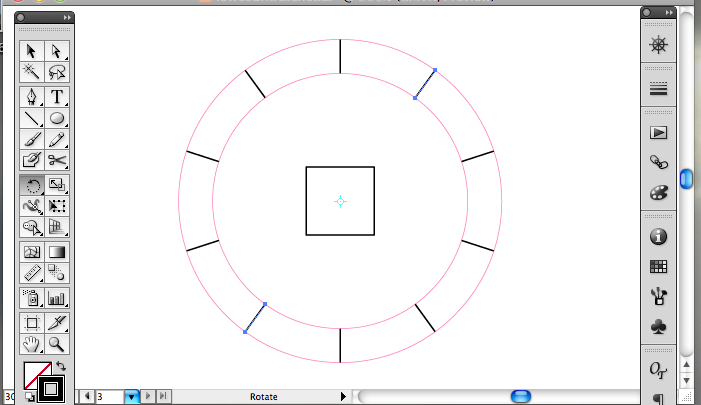
Repeat this process three more times to create a ring of ten lines.
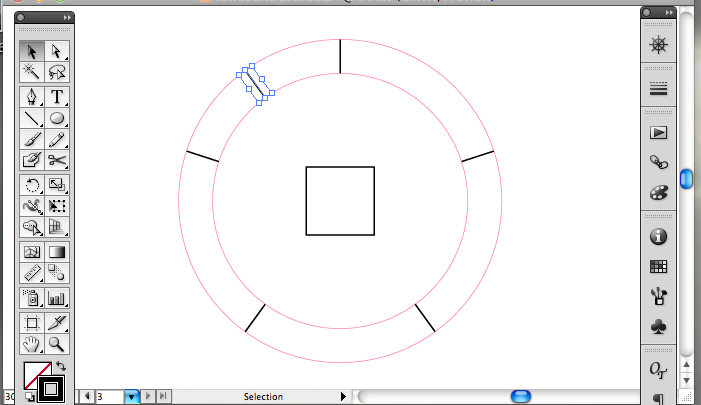
Delete the alternate lines leaving 5. One for each tooth.
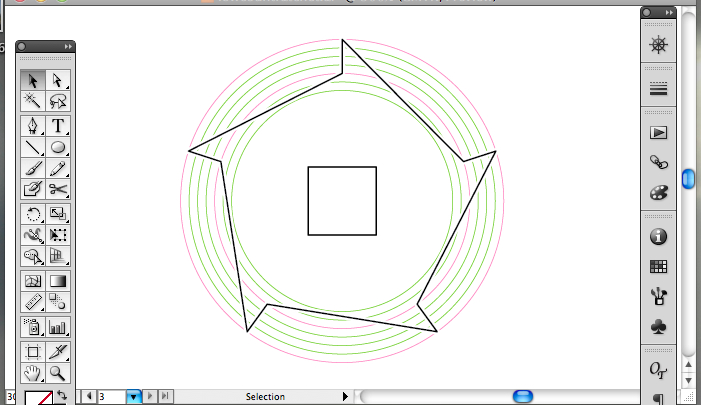
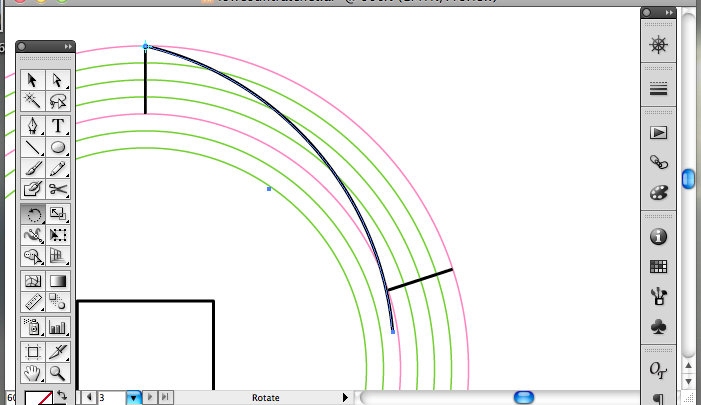
At this point on my original eighteen toothed wheel I simply joined these lines together as shown above. I've added the green concentric circles to help clarify the problem. Follow the length of one of the long flats from one tooth to the next starting at the bottom of a tooth. Notice that, in effect, the surface first drops down then raises up rather than rising gradually. To overcome this I added curves to the surface.
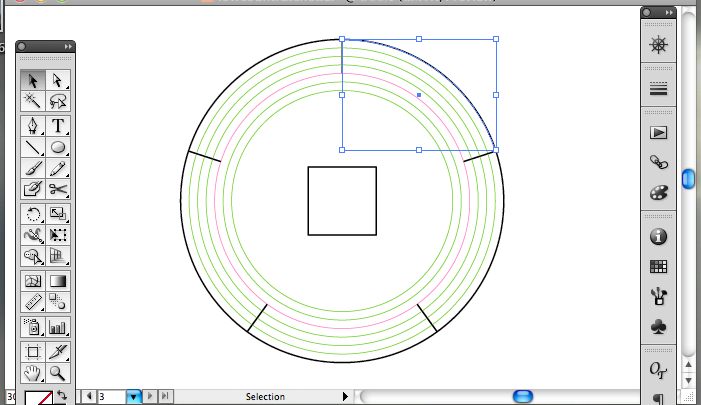
First I constructed a circle round the outside of the five lines. Using the scissors tool, I cut the circle leaving the fifth of a circle arc bounded by the blue box.

I deleted the remaining four fifths of the circle. I selected the arc and centred the rotation tooth at the top left of the arc. You can just make out the cross hairs in light blue on the picture above.
I rotated the arc so that it just touched the bottom of the second tooth line.
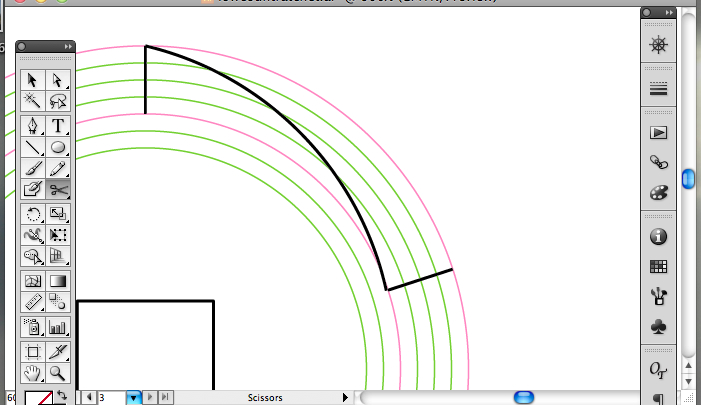
Then cut the line to length.
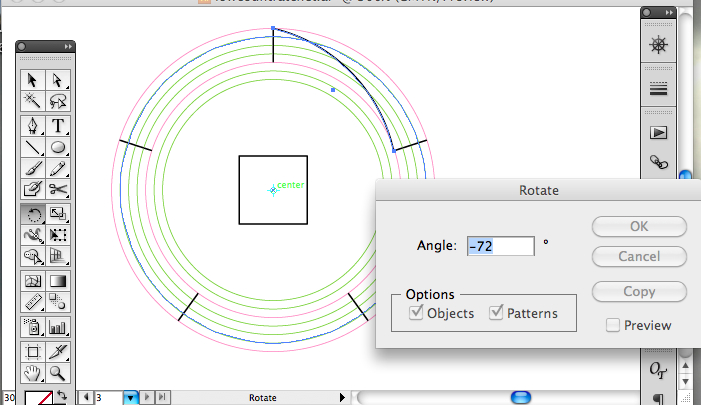
I selected the arc again and this time set the rotation tool to rotate around the centre of the centre square. I set the rotation to -72 degrees and clicked copy.
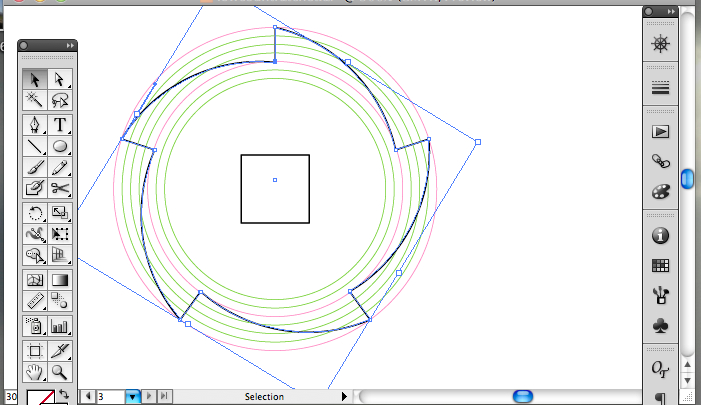
Repeat that process three more times to complete the outline.
Complete the wheel using the 'join' command on each of the joints.
